Skylodge Adventure Suites Peru – Full Review
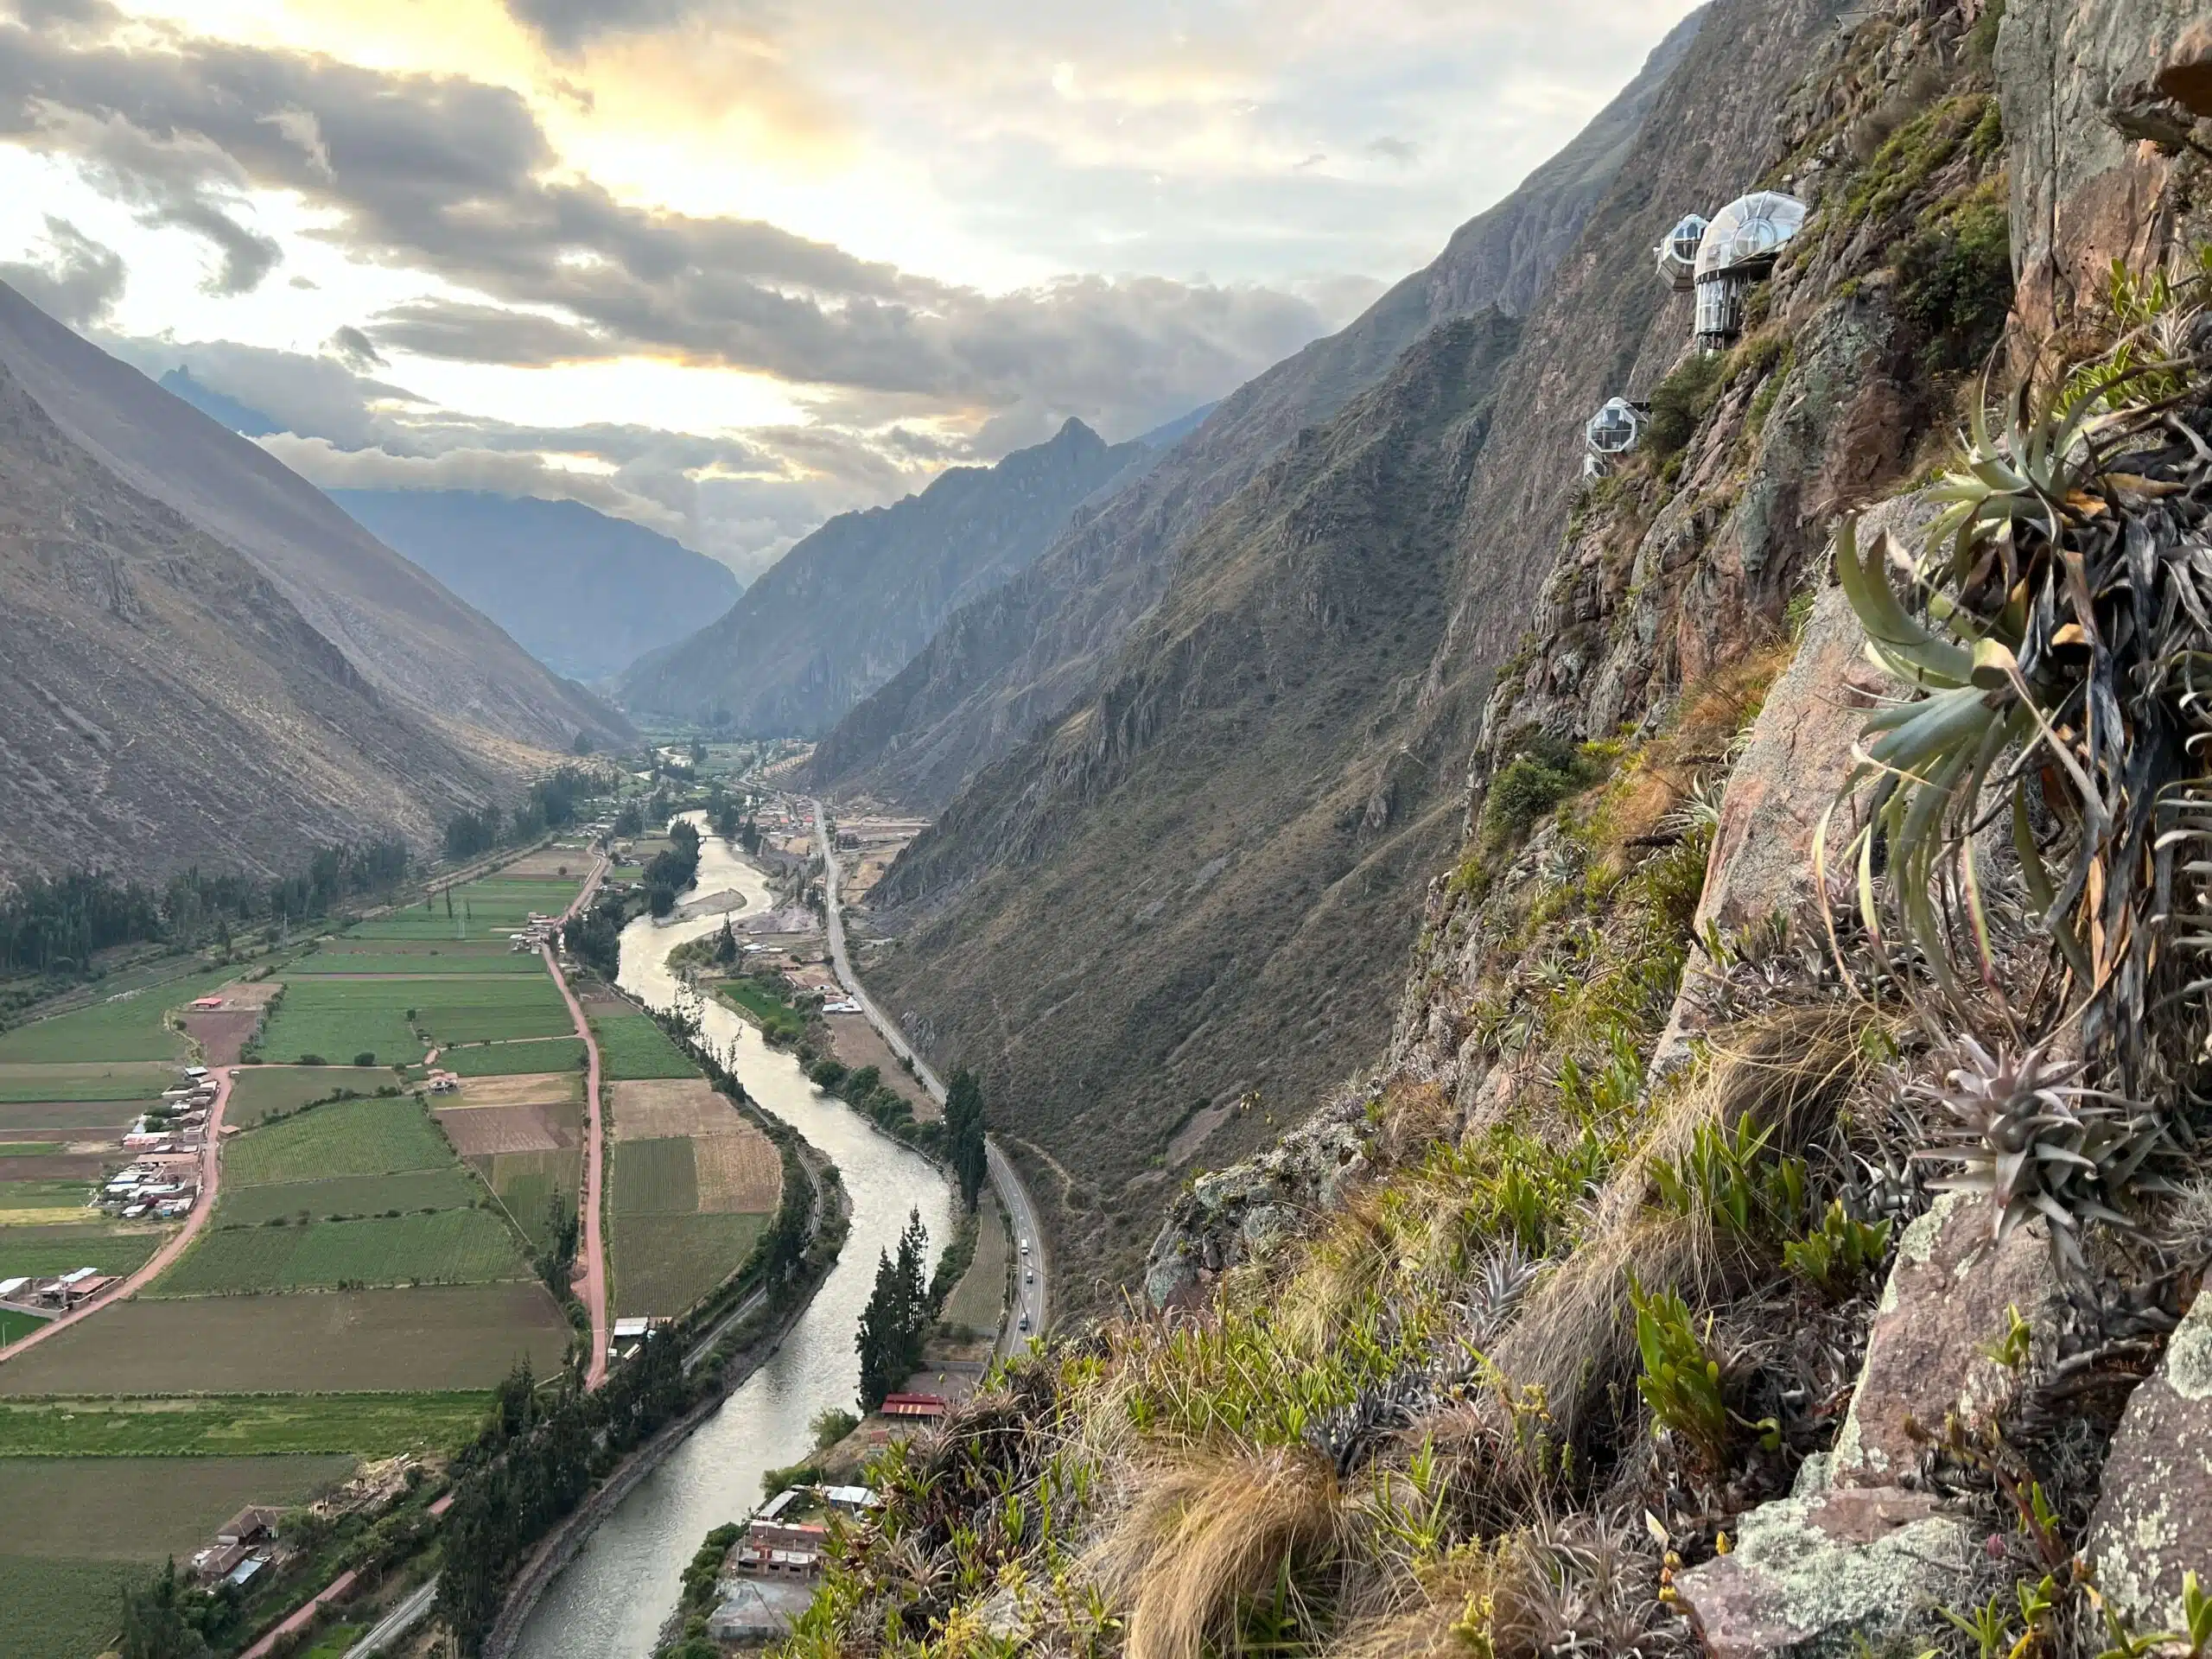
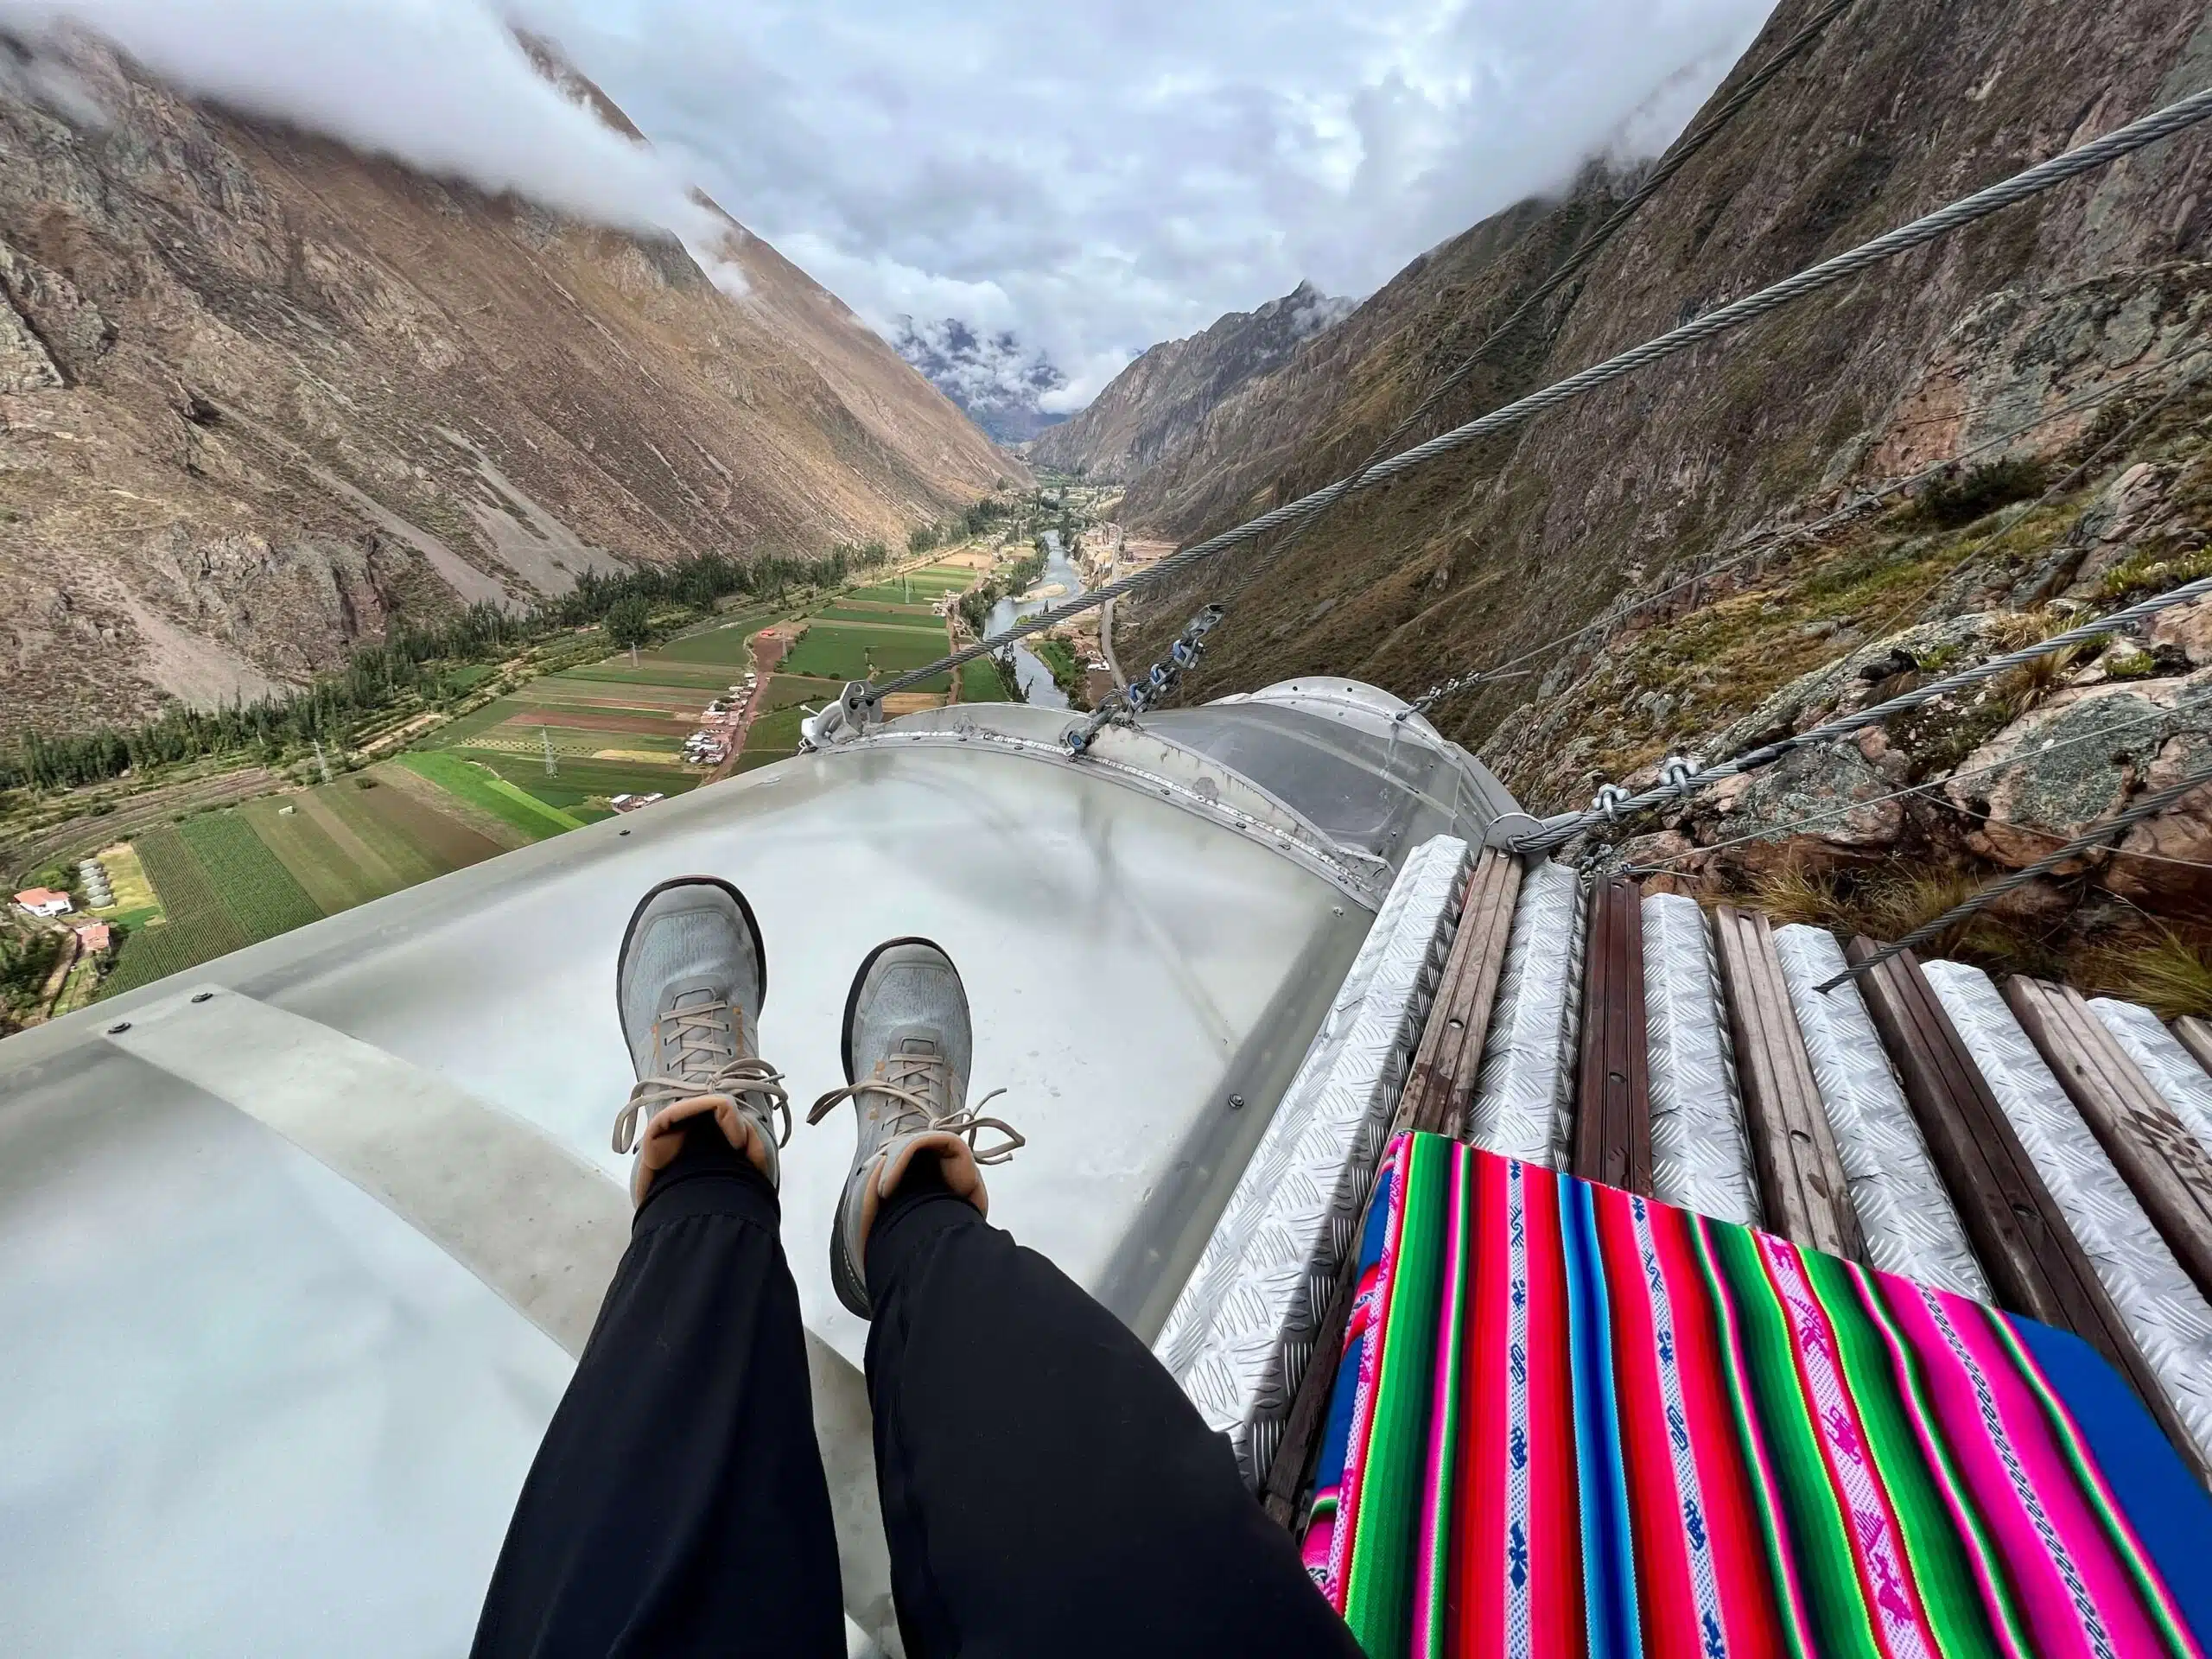
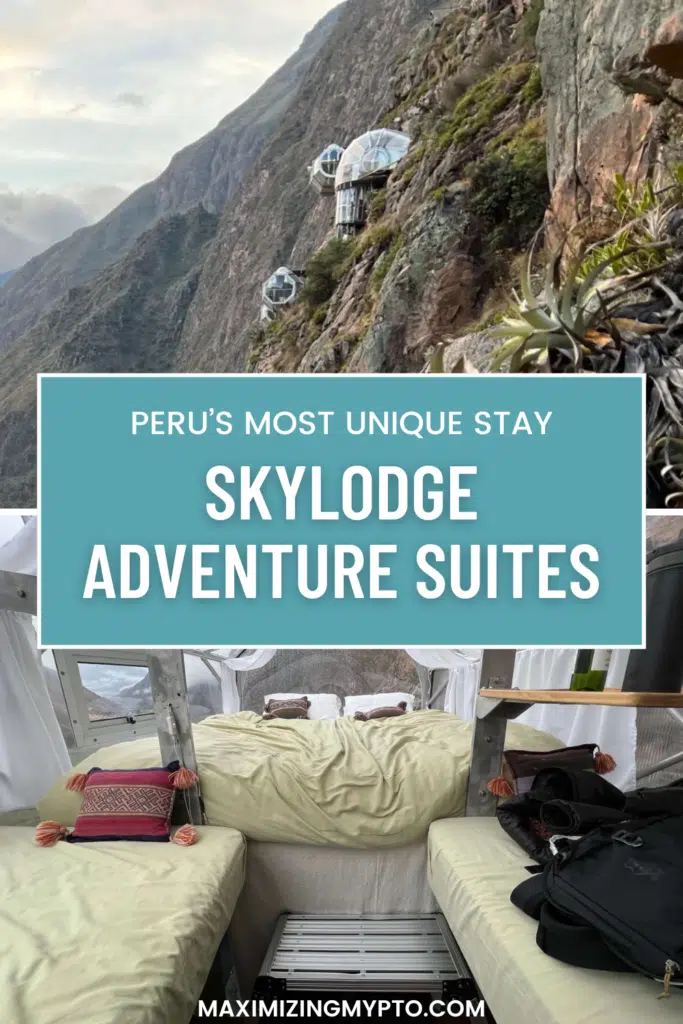
My trip to Peru was my first time in South America and while I got to see Machu Picchu, that major highlight has to be tied with one of the craziest adventures I’ve ever had. In the Sacred Valley of Peru is Skylodge Adventure Suites: 3 glass pods that hang on the side of a mountain 400 meters (~1300 feet) above the valley floor. Climbing up, sleeping in the pod, and waking up to one of the most epic views of my life is an experience that will forever stay with me. I had both excitement and anxiety going into the excursion, but it was hands down one of the coolest things I’ve ever done!
This post may contain affiliate links, which means I’ll receive a commission if you purchase through my link, at no extra cost to you.
What is Skylodge?
Skylodge Adventure Suites is the first of its kind hanging hotel. Located near the town of Ollantaytambo, the glass pods are suspended 1300 feet in the air. To reach the pods, you have to climb a via ferrata (Italian for “iron road”). This is a series of iron rungs drilled into the side of the mountain. You are clipped into a cable the whole time for safety. Via ferratas were originally used by soldiers in WWI to cross mountains, but are now used recreationally. This one in the Sacred Valley is the first one ever built in South America. The three sleeping pods were built in 2013 and the dining pod was built in 2017.
I first heard about this adventure from my favorite Youtubers, Kara & Nate, and knew I had to put it on my Peru trip itinerary. I definitely had reservations though, so I researched every available review and video I could find to get enough confidence I wouldn’t die. If you’re in the same boat, hopefully my review helps!
Who can participate?
Skylodge offers a variety of options for partaking in their experience, including one day options to zip line, via ferrata, and/or have lunch in the dining pod. While some options are open to kids, you must be 16+ to spend a night in the pods.
Beyond the minimum age requirement, you do have to be in moderate shape and have full mobility to climb for about 2 hours. There’s also a 265lb weight limit for safety.
How to Book
There are several ways to book your Skylodge experience. You can book it directly with NaturaVive, through GetYourGuide or similar sites, or through a travel agent if you’re working with one. We used Inca Experts to execute our entire trip to Peru, so when we told them we wanted to have Skylodge as part of the itinerary, they took care of the booking for us.
There are only 3 pods, so be sure to book early!
My Experience
Gearing Up
We had a private driver drop us off around 3PM, though Skylodge does provide transportation if you need it. We had to sign our life away on a liability waiver and show the guide our passports while we waited for the rest of the group to arrive.
You can only bring what you can carry in a backpack up to Skylodge, so we stored our larger bags with our hotel in the Sacred Valley prior to arriving.
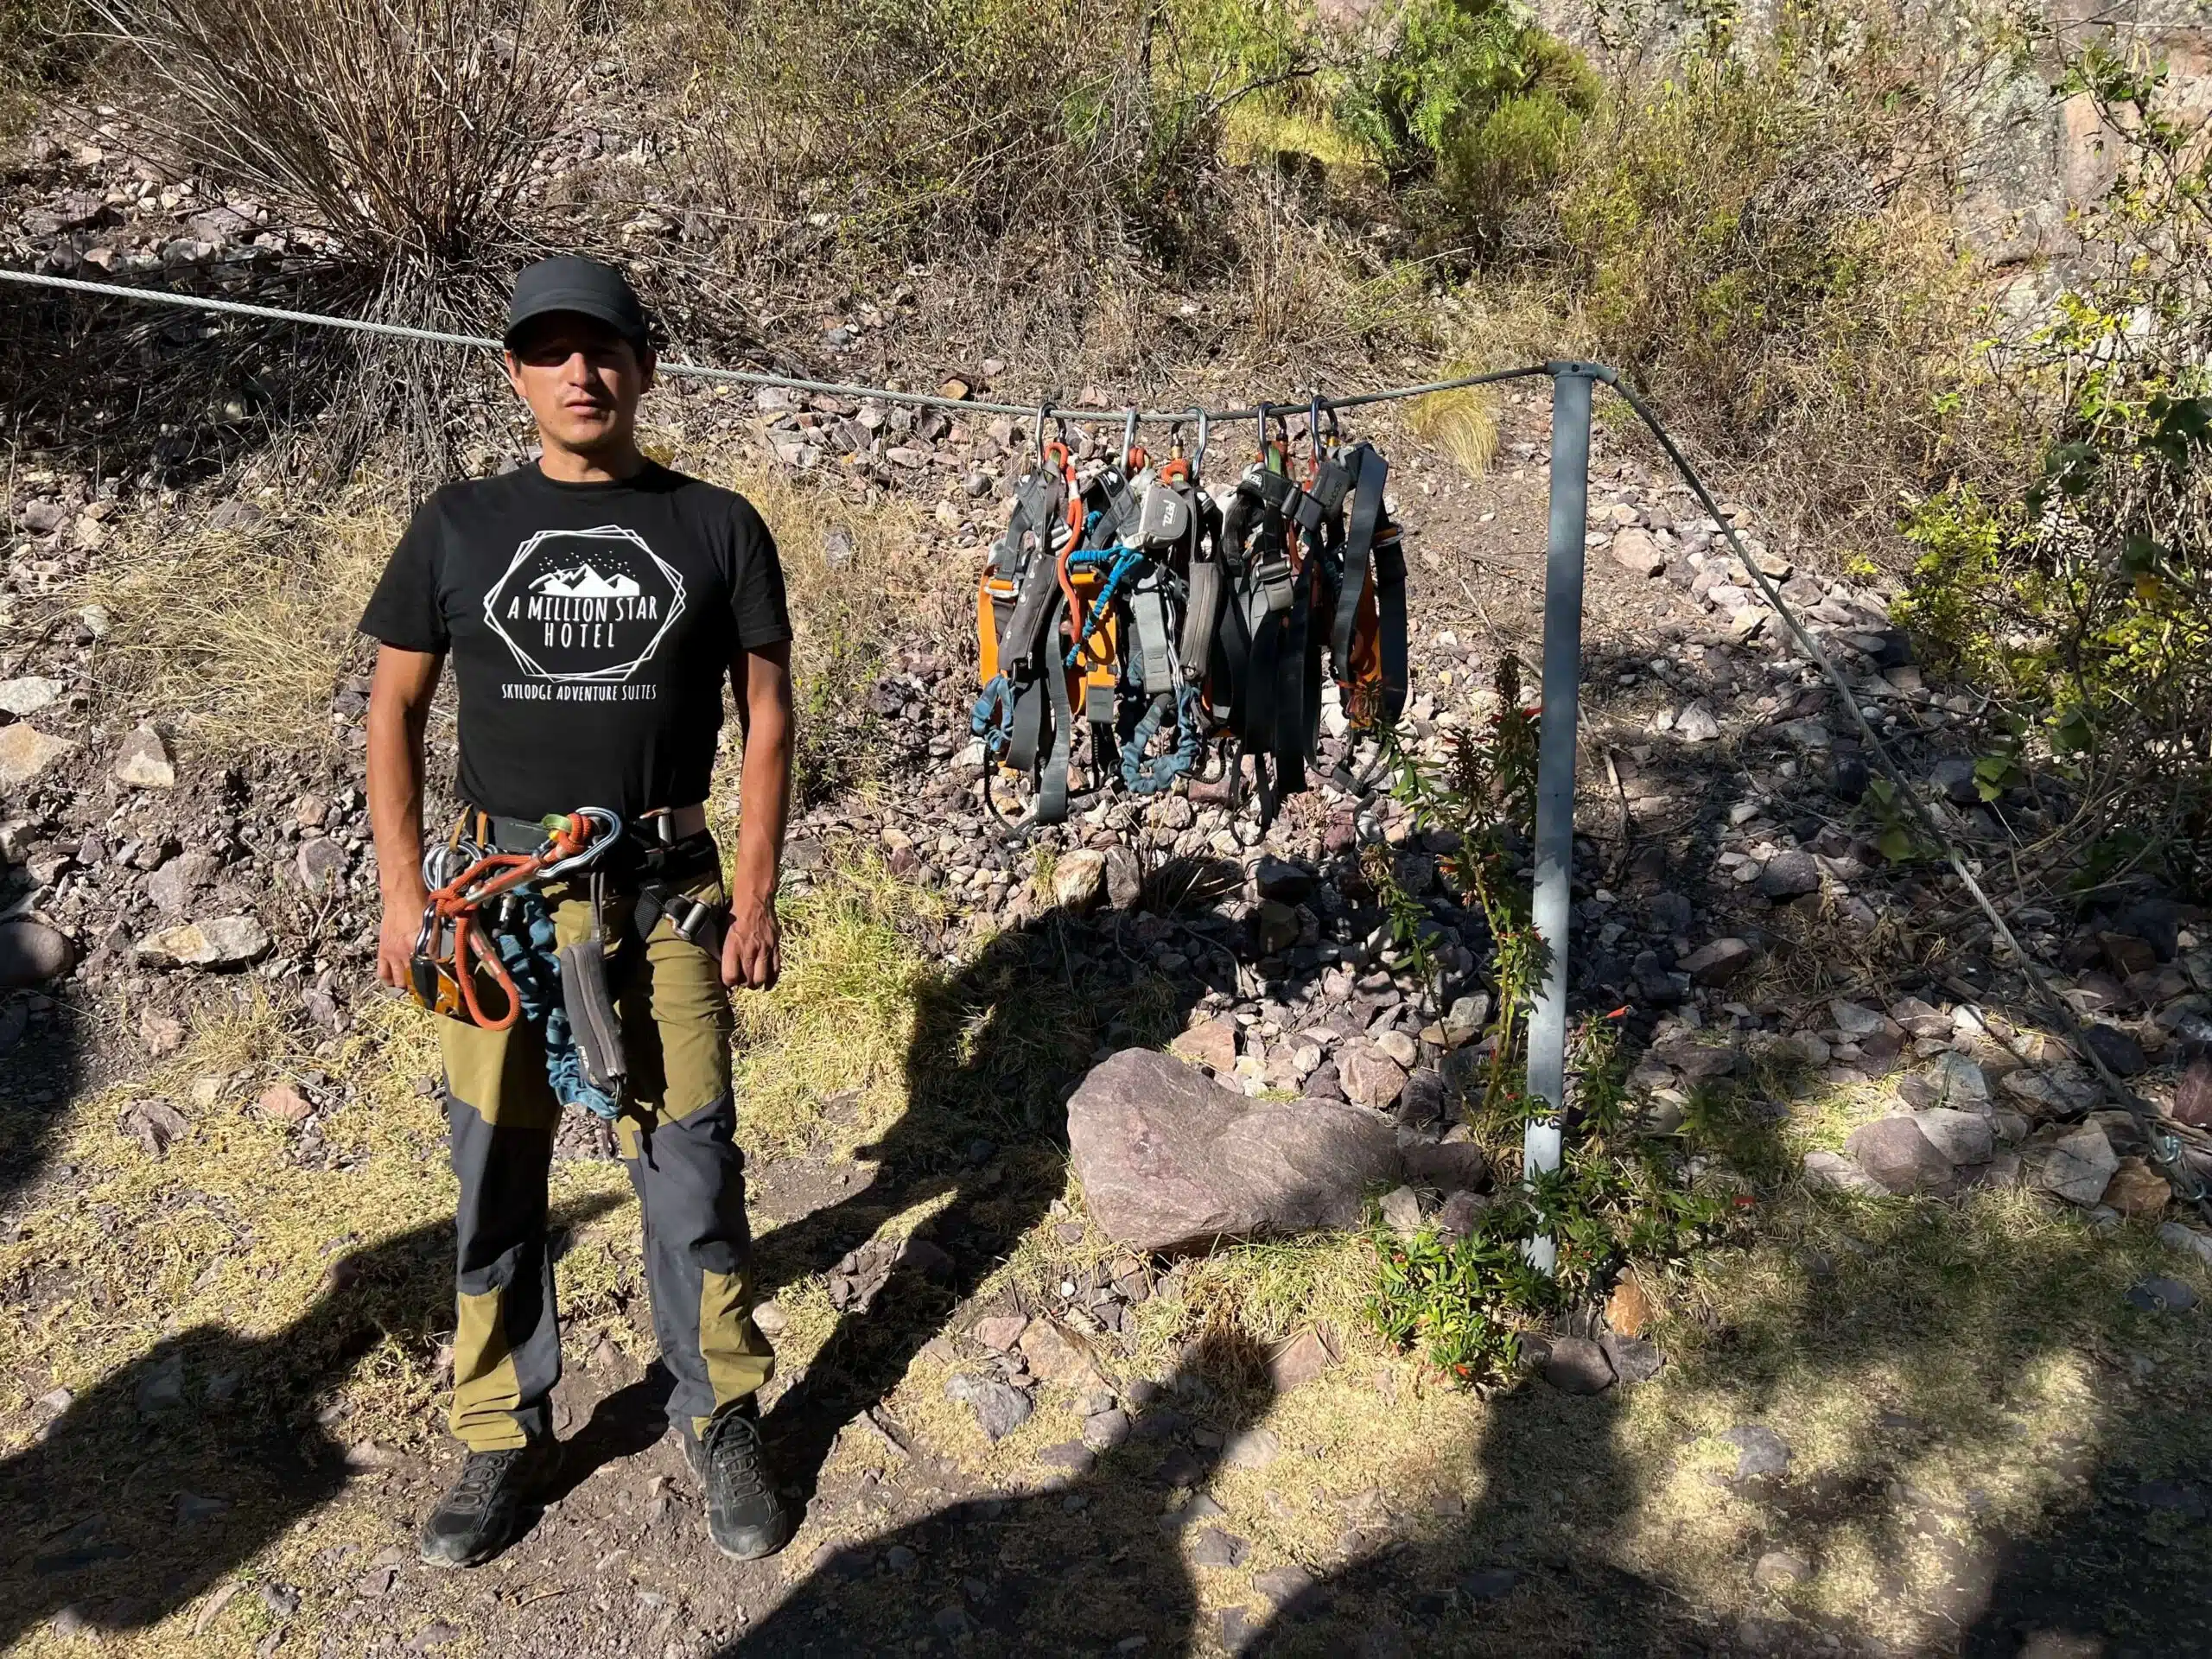
Skylodge Base Camp (as they call it) has 2 bathrooms and a place to fill your bottle with filtered water before you set off. They also have a gift shop with hats, t-shirts, sweatshirts, snacks, etc. We bought a hat to remember this experience and it only cost $5.23 (we paid with credit card but they also took cash).
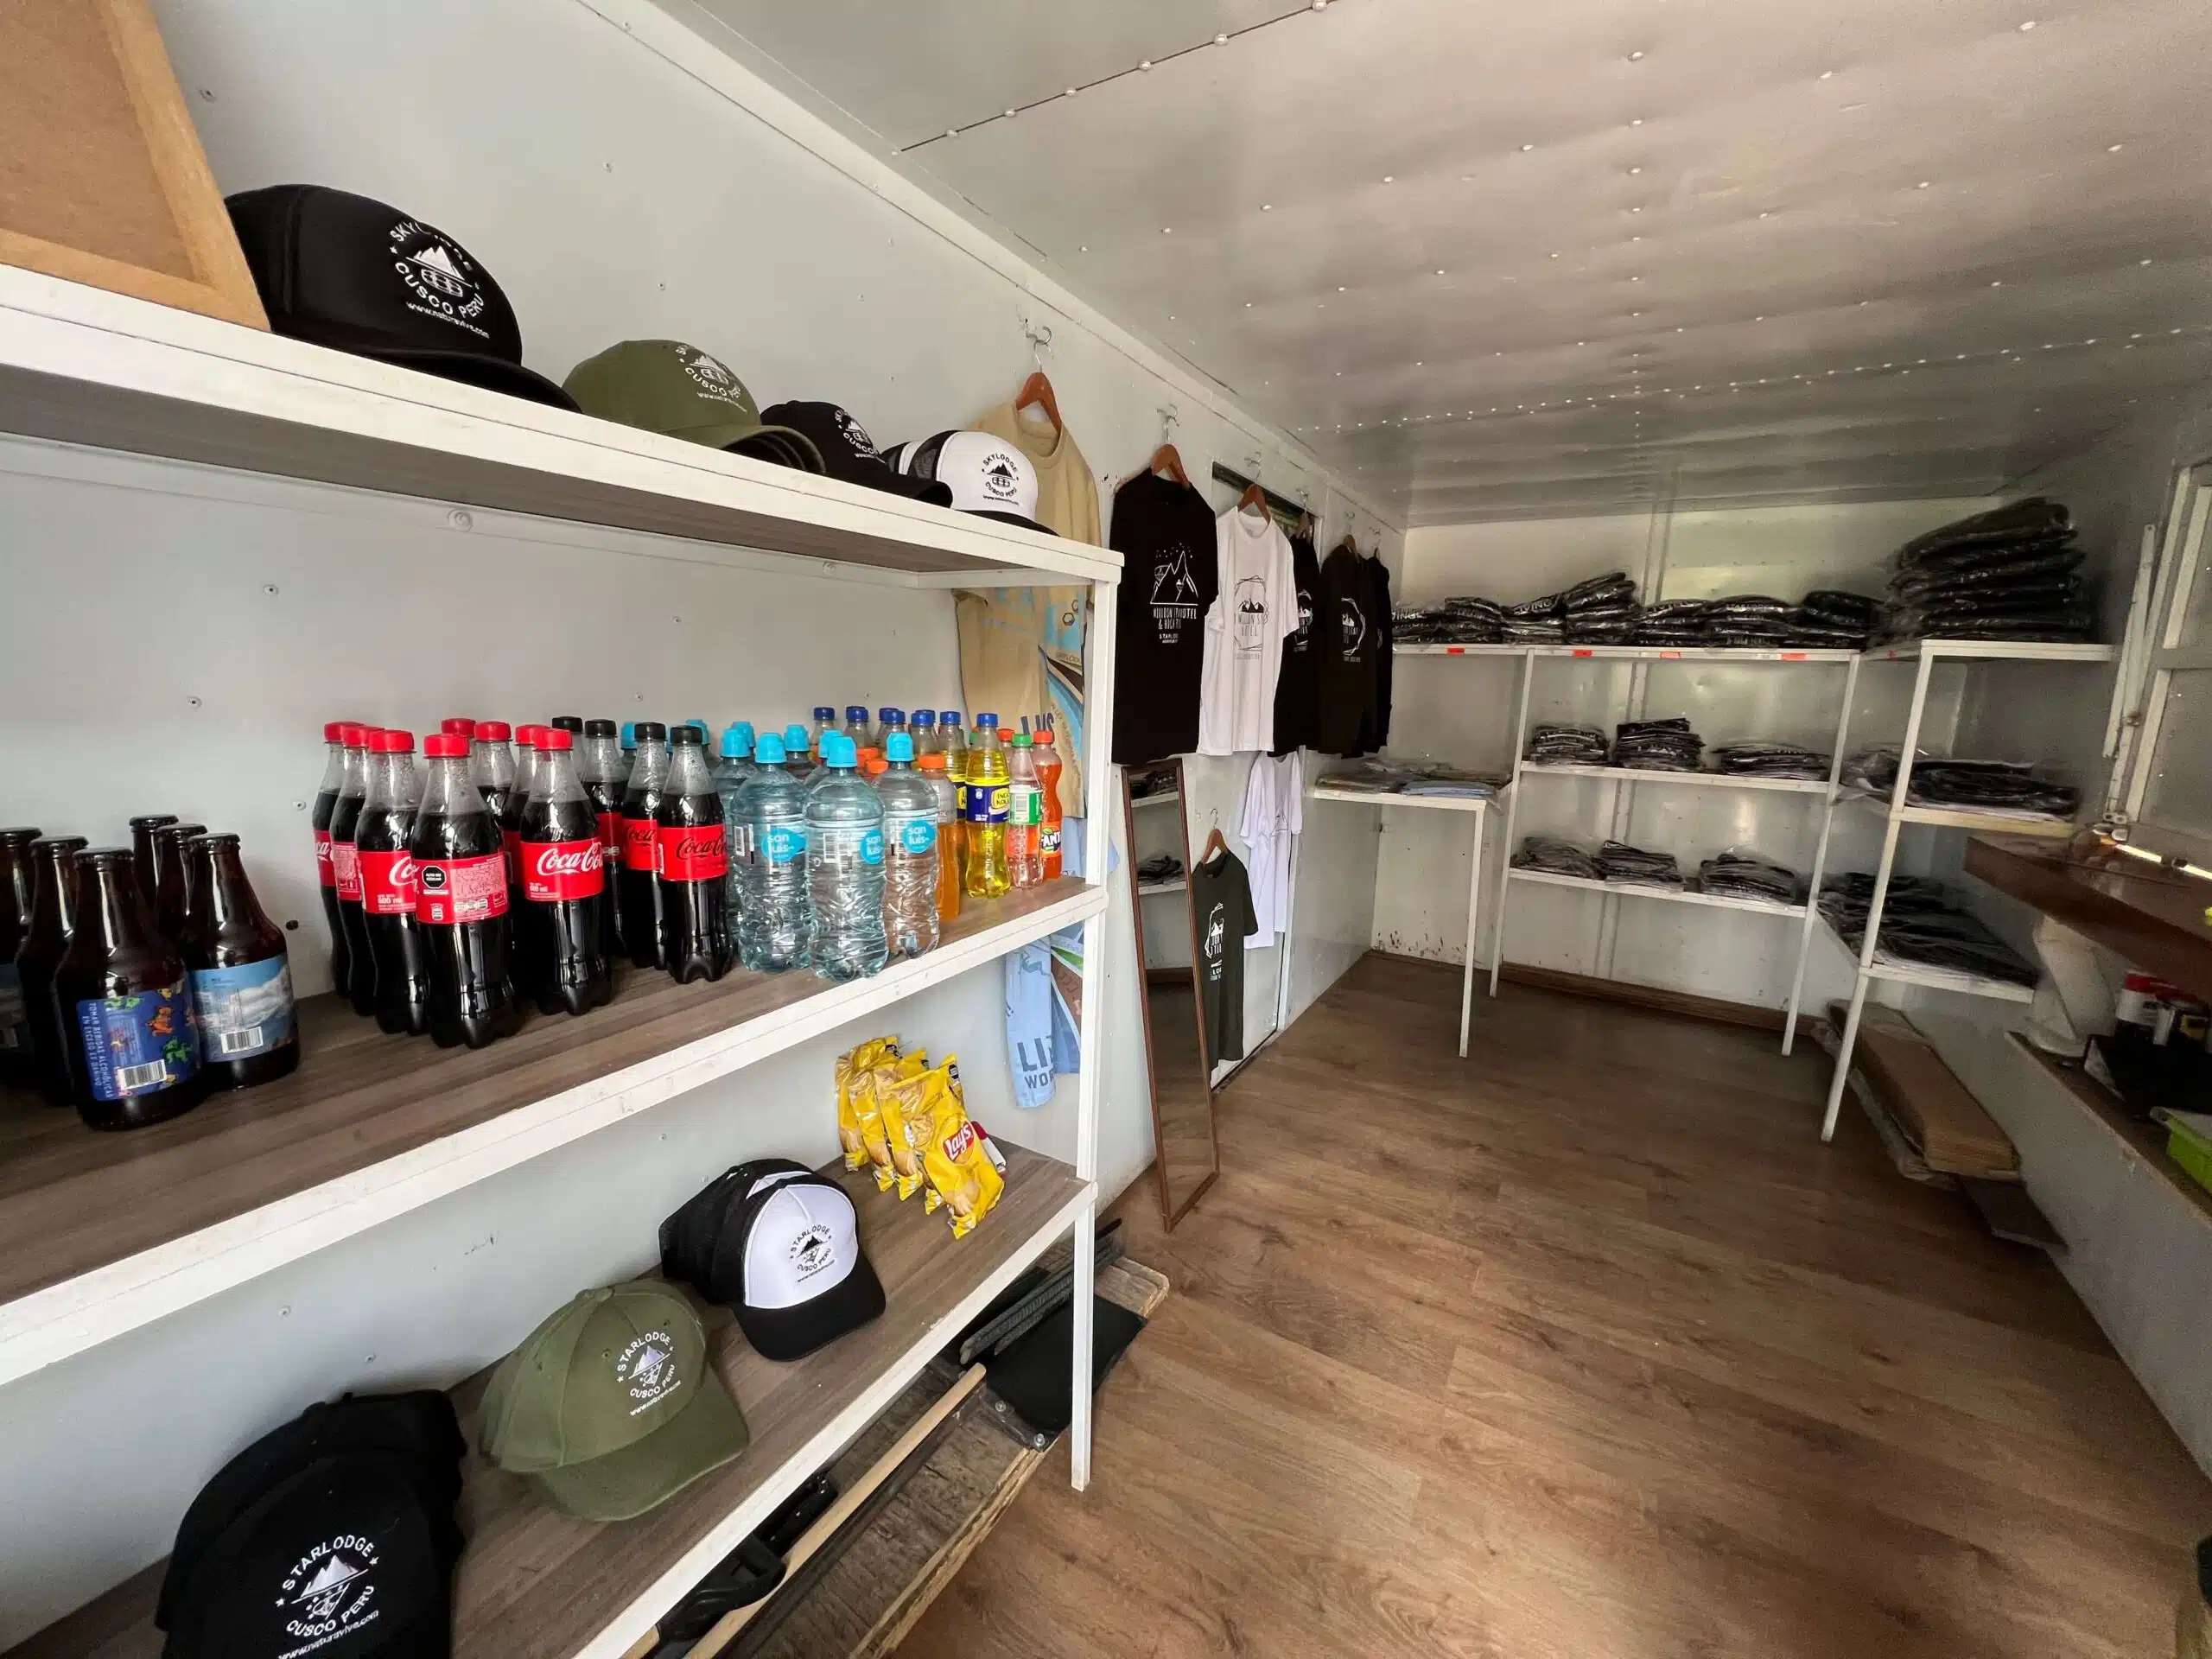
Just before 4PM everyone else showed up and we got our gear, which consisted of fingerless gloves, a harness with zipline and via ferrata equipment, and a helmet. We had our GoPro with us and my husband made sure to grab the one helmet with a GoPro mount already attached. If you do bring a GoPro, make sure to bring an extra sticky mount just in case there are none available.
They then did a brief safety overview and instruction on how to use the via ferrata equipment before we headed off to start our climb around 4:15.
Climbing Up
We had a short walk to the base of the via ferrata where the guide had to release a ladder that marked the start of the climb. Much like on the Grindelwald Canyon Swing, my strategy for tackling my anxiety was to power through and go first of the group. Once your order is established climbing up, you can’t really change it. Being in front also meant I set the pace and I didn’t want to slow us all down.
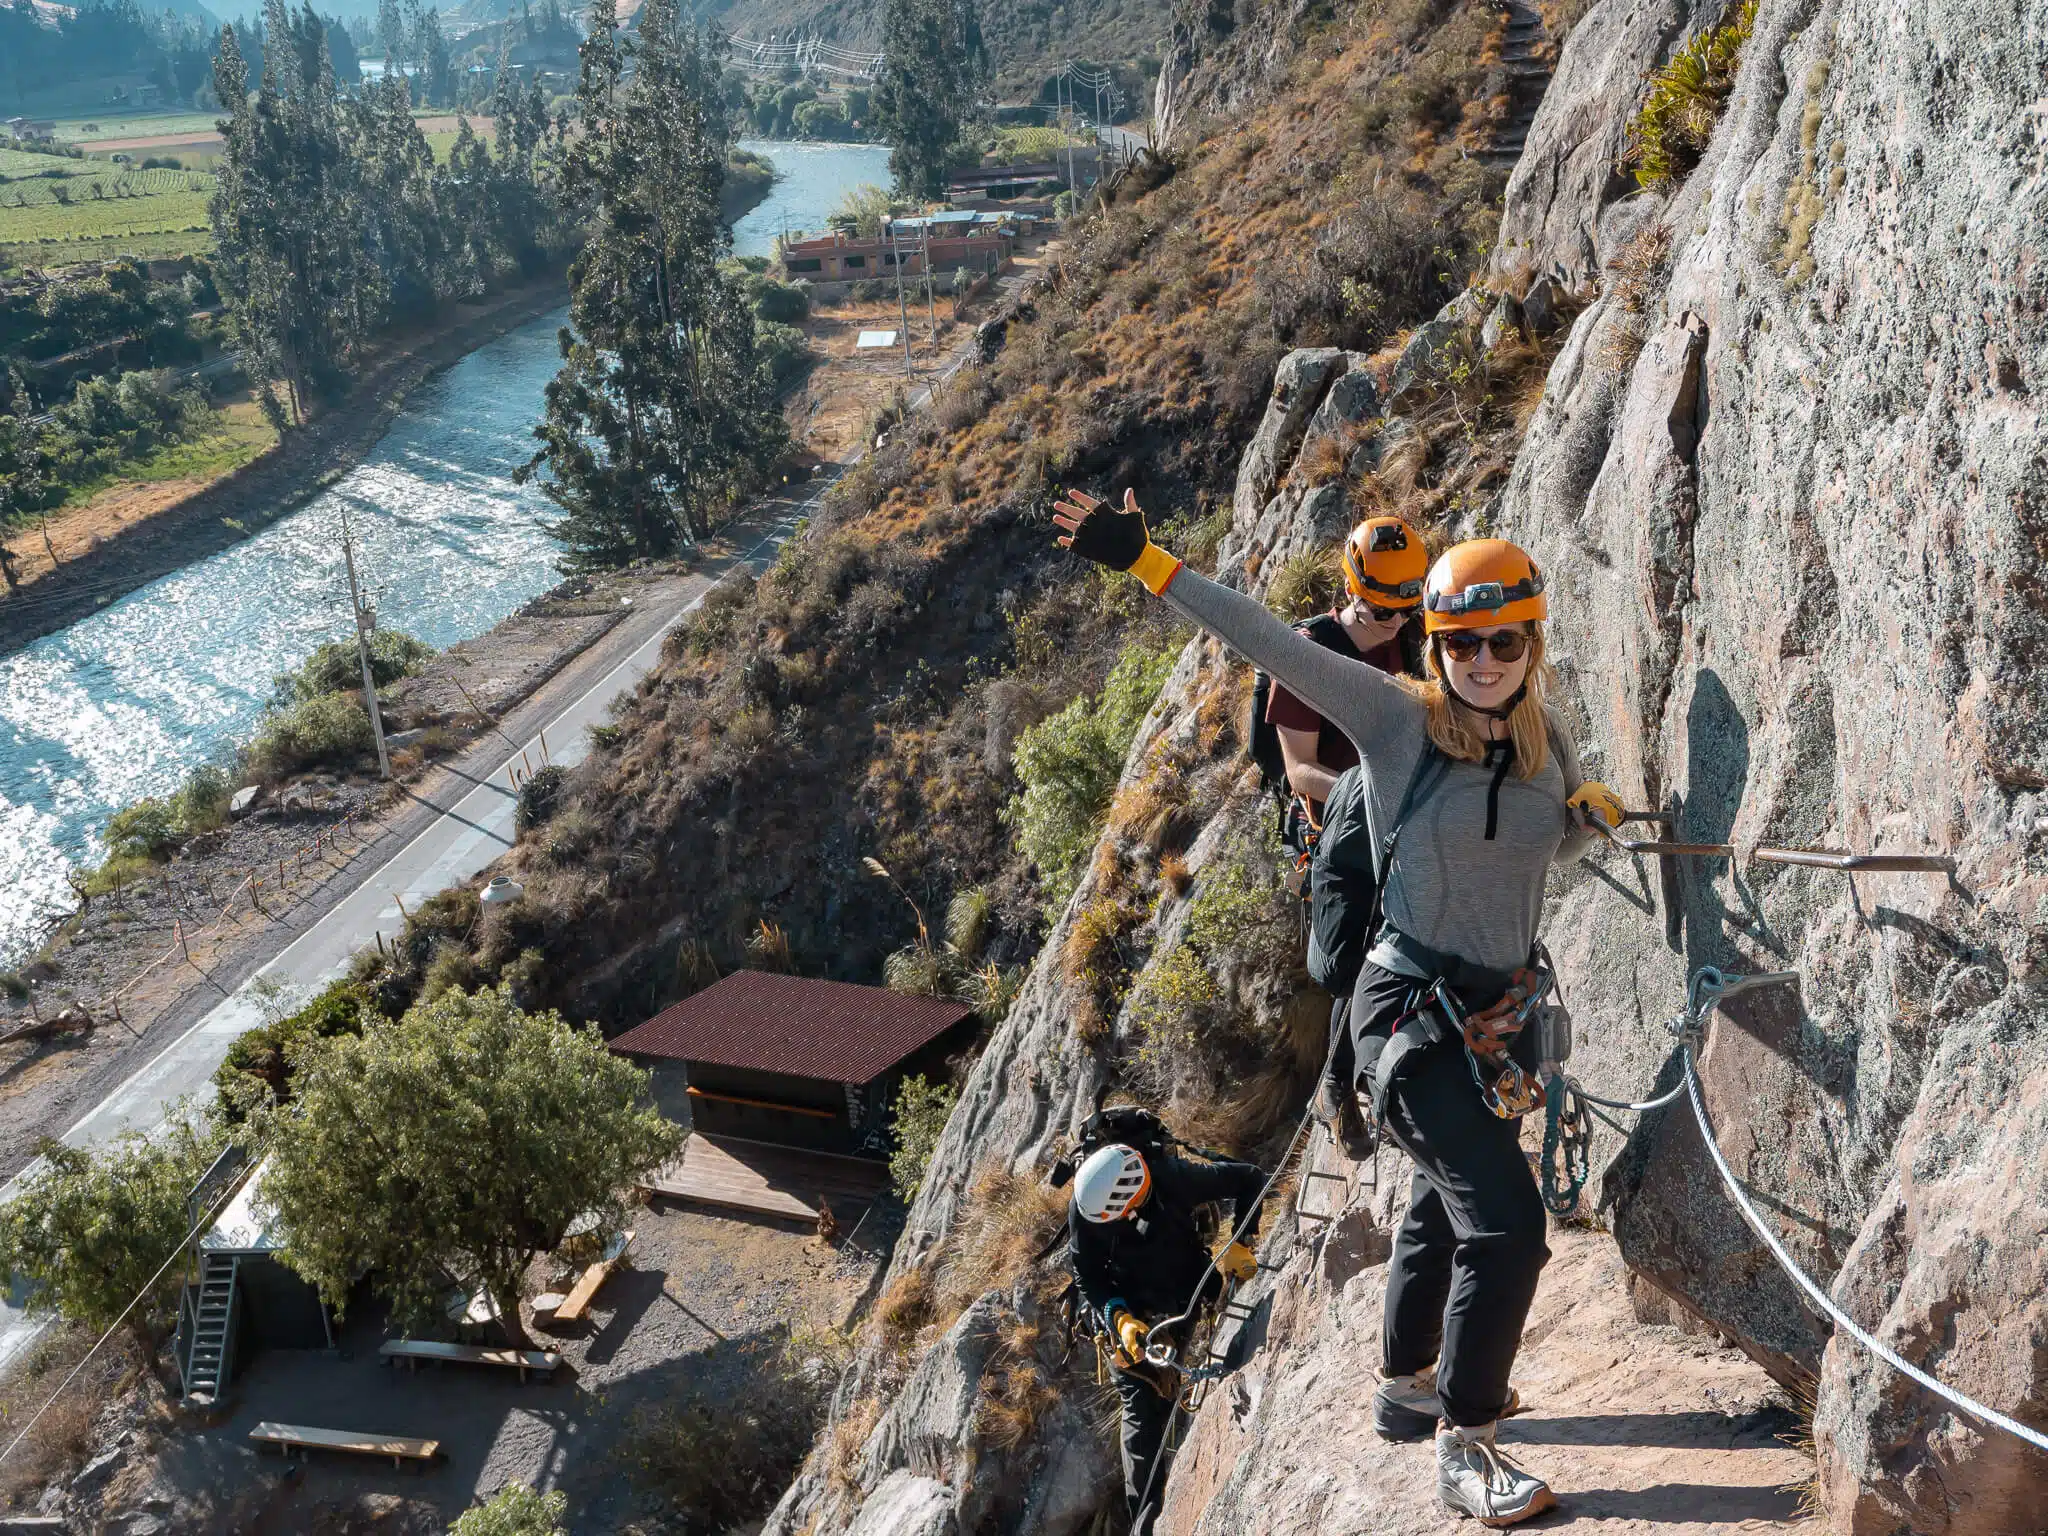
I rock climb regularly at home but have never done a via ferrata. Thankfully, I didn’t find the climb difficult at all, even at 9,000 feet of elevation. The rungs are much easier to hold onto than holds at a rock-climbing gym and I felt surprisingly confident. Every so often you have to switch your carabiners to the next set of cables, making sure to only ever change one at a time so you’re always attached in case of a fall. I quickly settled into a routine of climbing up and changing cables.
Approximately halfway up is a cable bridge consisting of 2 metal wires at your feet and one for your hands to hold onto. I had been really nervous about this part specifically after seeing it online, but in the moment, I wasn’t scared at all. It was easy to cross and didn’t sway – I was honestly sad when I finished it! Now I will note that I’m only 5’4” and that means I have a lower center of gravity than others. This seemed to come in handy on the bridge because my 6’1” husband had a harder time. If you get scared, remind yourself that the youngest person to ever make the climb was 6 years old (and the oldest was 82)!
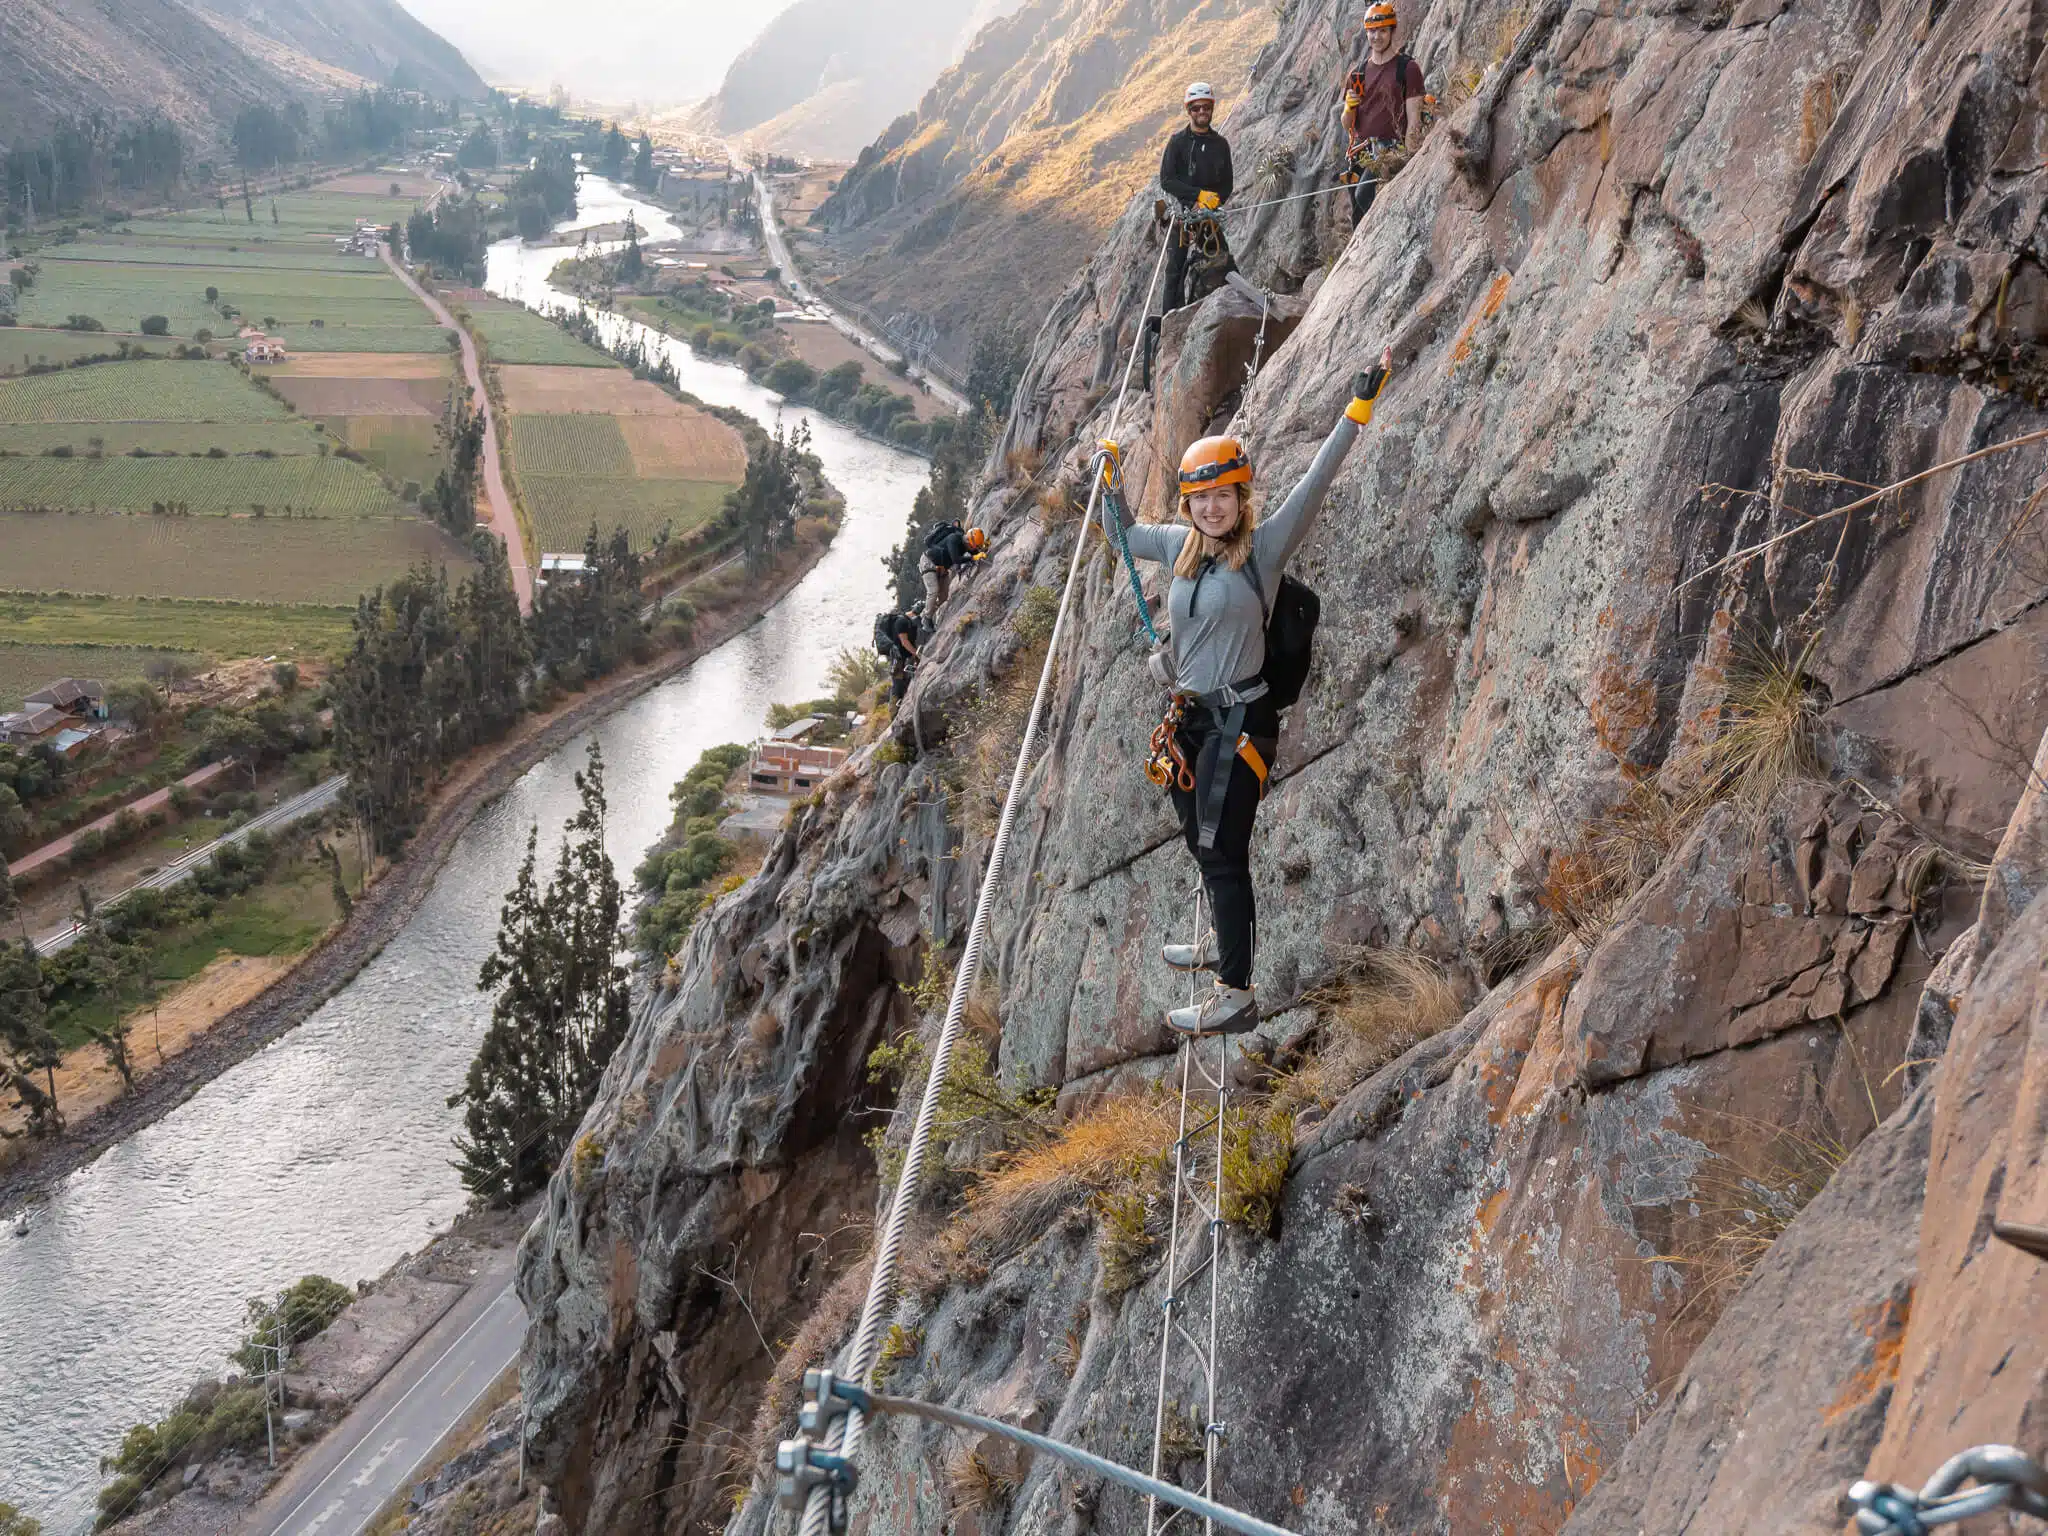
I was asked to stop and wait several times as the other couples behind me were slower and they wanted us to stay close together. We got to the top ~1.5 hours after we started and entered the dining pod around 5:50PM.
The Food
Dinner
The sun set around 6PM when they served us dinner. The first course was a delicious pumpkin soup, followed by a salad that Thomas and I chose not to eat (we were erring on the side of caution to avoid getting sick). The main course was chicken Corden bleu with potatoes and vegetables. One girl in our group was vegetarian and had let them know in advance, so they had and alternative main course for her. Dessert was a quinoa bar with some of the juiciest mango I’ve ever had.

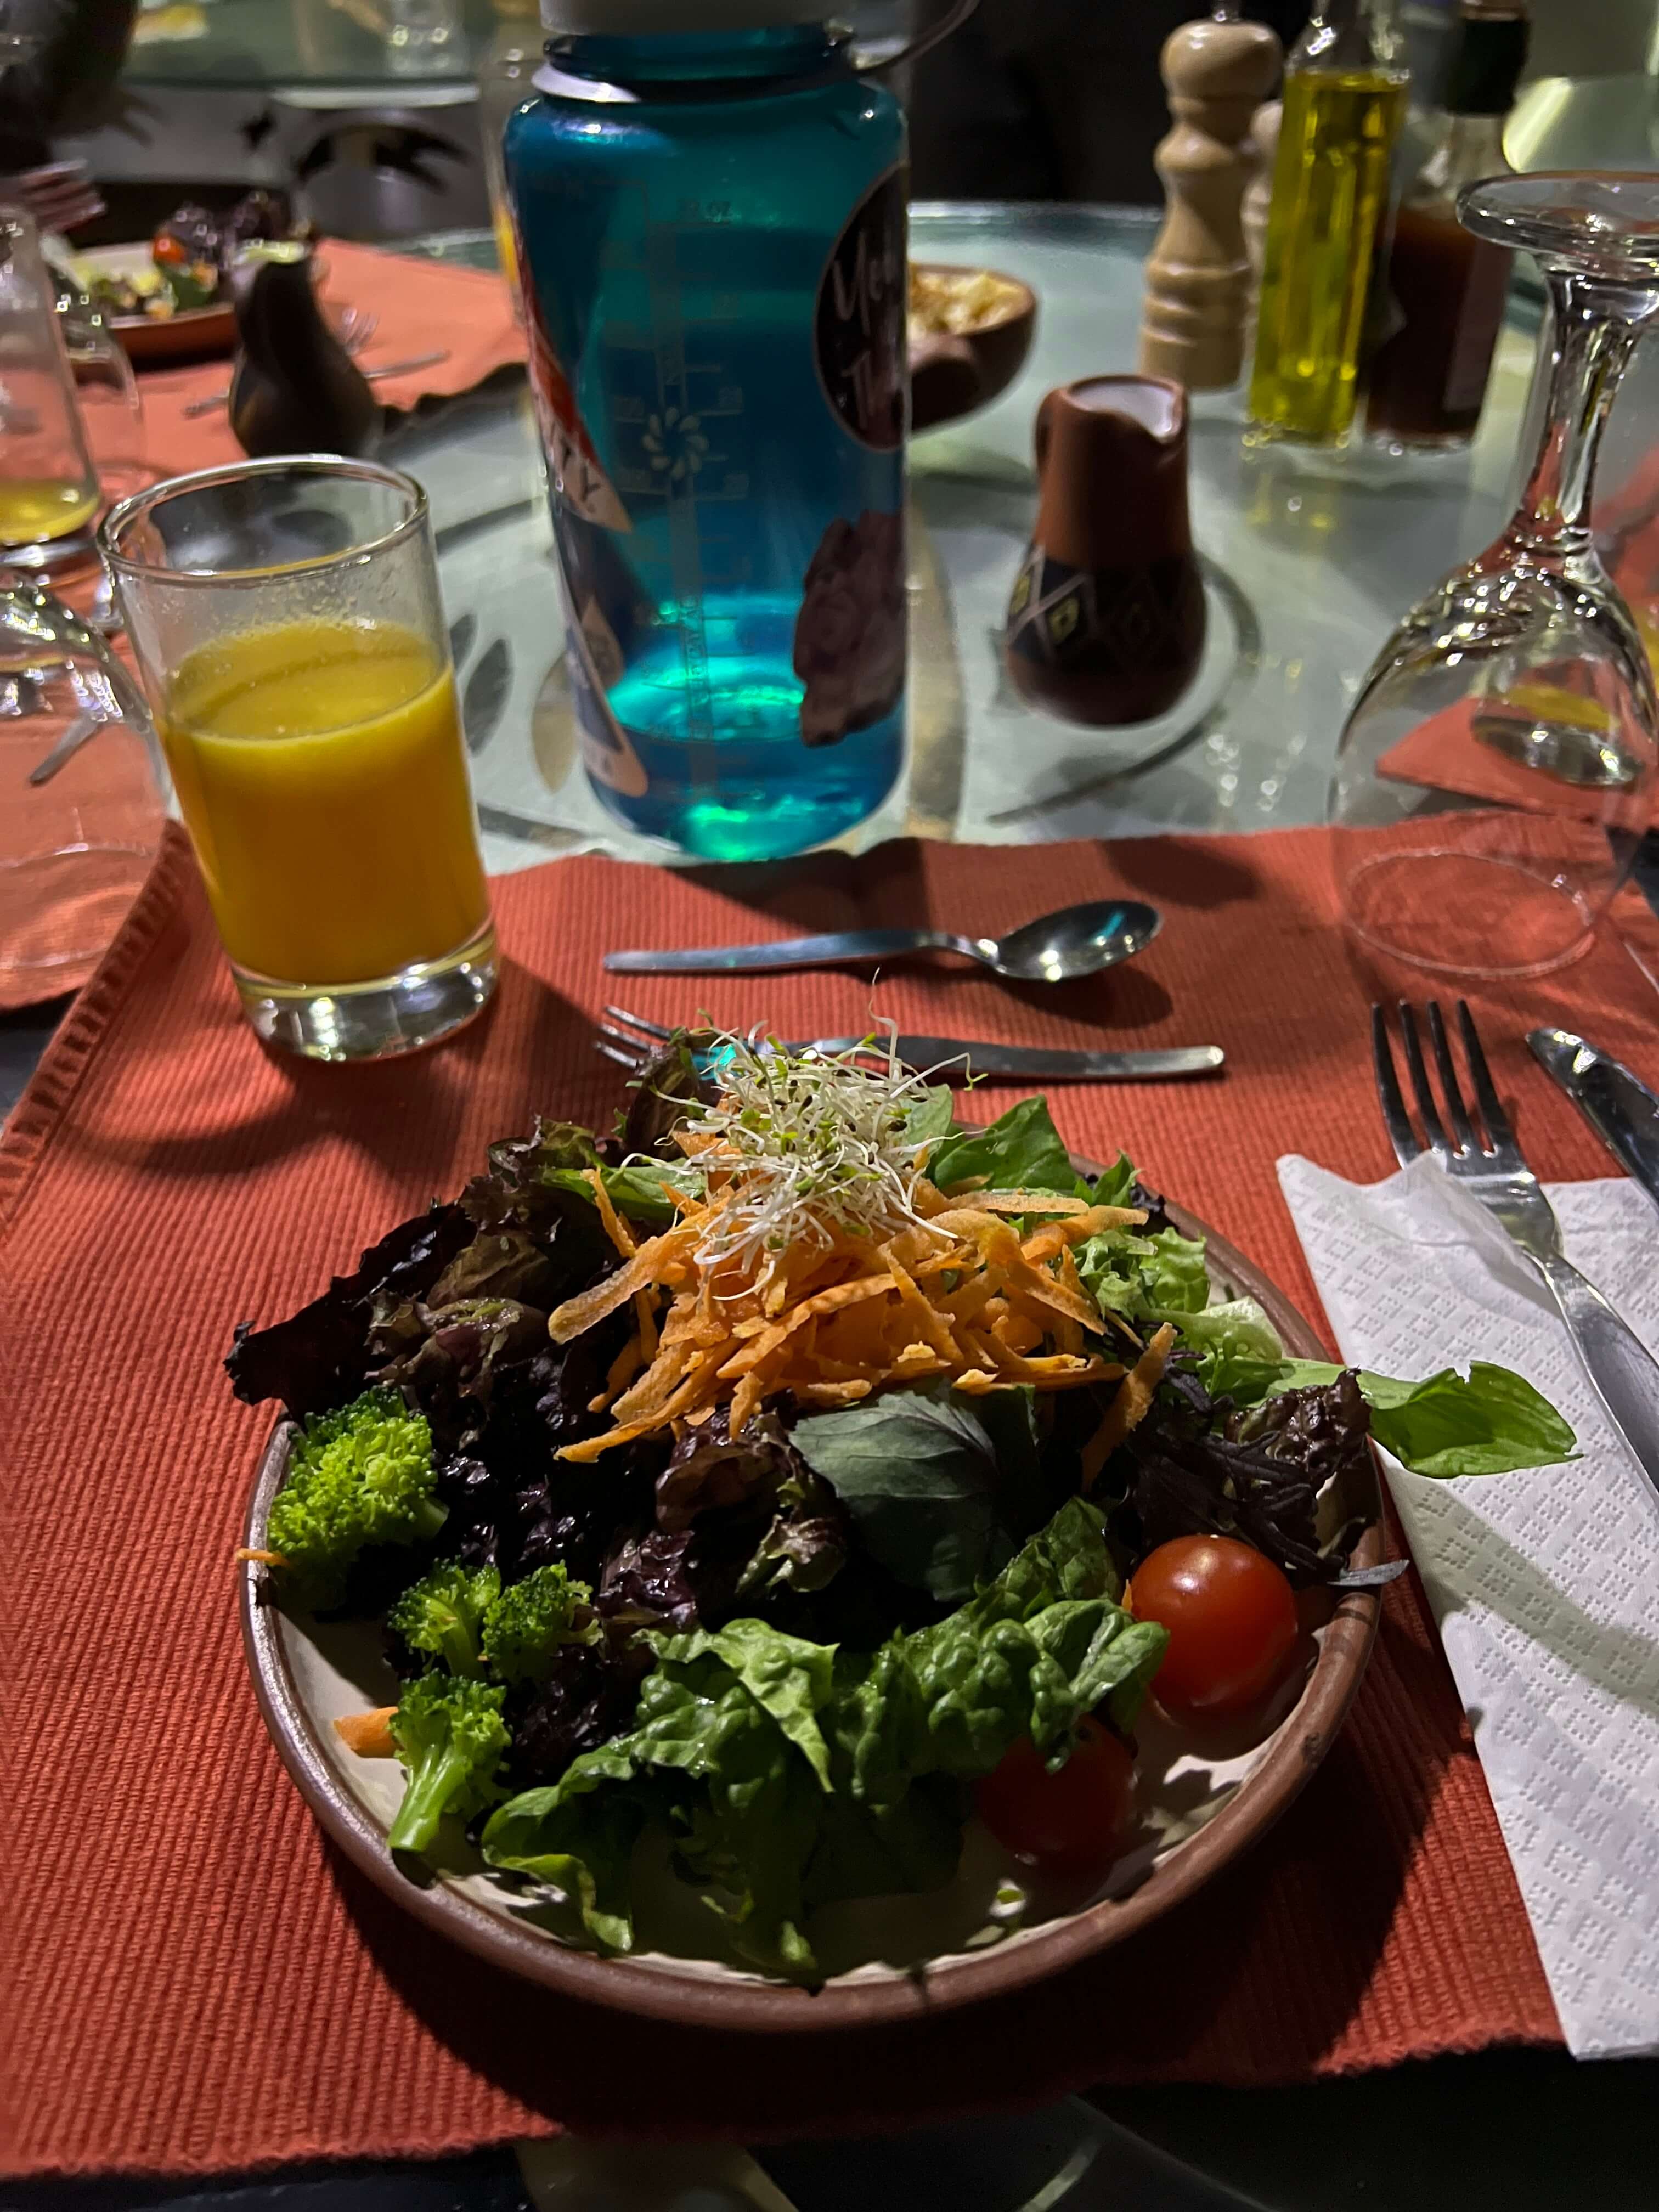


Overall, the food was pretty impressive for having been carried up the side of the mountain, but don’t expect it to be the best meal of your entire life (we happened to eat at the #1 restaurant in the world just the night before so it wasn’t a fair comparison). We’d pushed the 3 tables together and dinner also turned out to be great conversation getting to know the other couples.
With dinner they offered us each a medium-sized bottle of wine, which was a Peruvian Malbec. We brought most of ours back to our pod to drink after dinner (and never even opened the second bottle). I really wanted to remain sober until I was done climbing for the day!
Breakfast
Breakfast the next morning was served at 7AM. It consisted of bread with butter, jam, and honey, fruit (bananas, grapes, and papaya), ham and cheese, yogurt, granola, scrambled eggs, and coffee/juice/tea. We didn’t eat the grapes, ham, or cheese to be safe, but everything else we had was delicious.
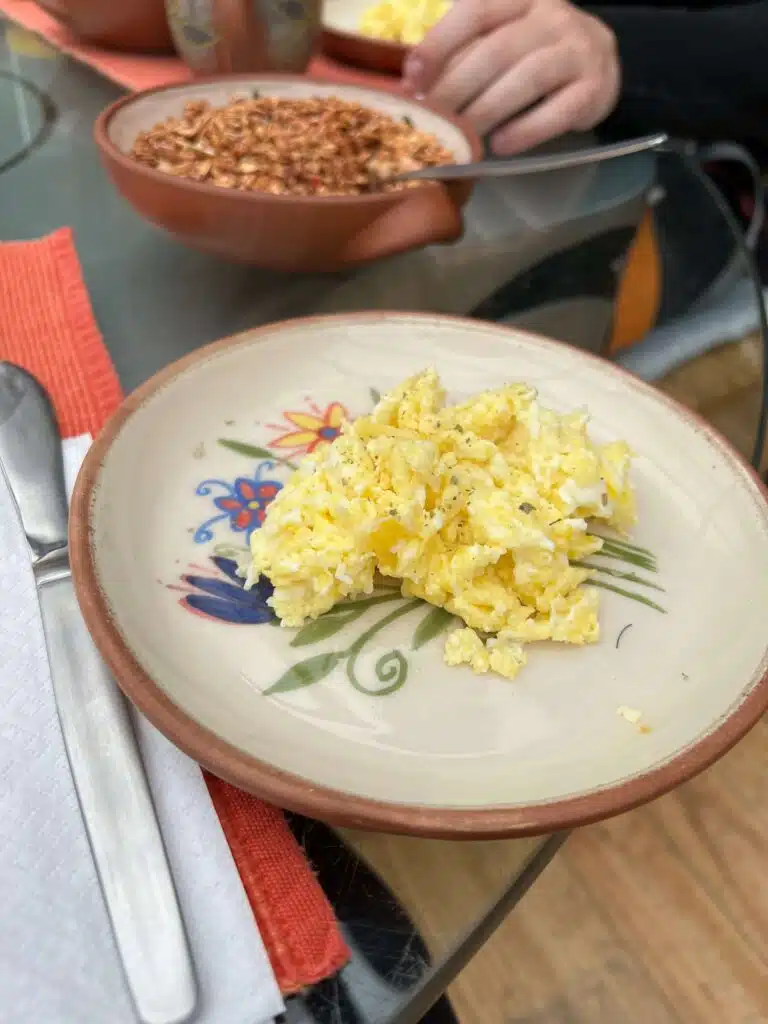
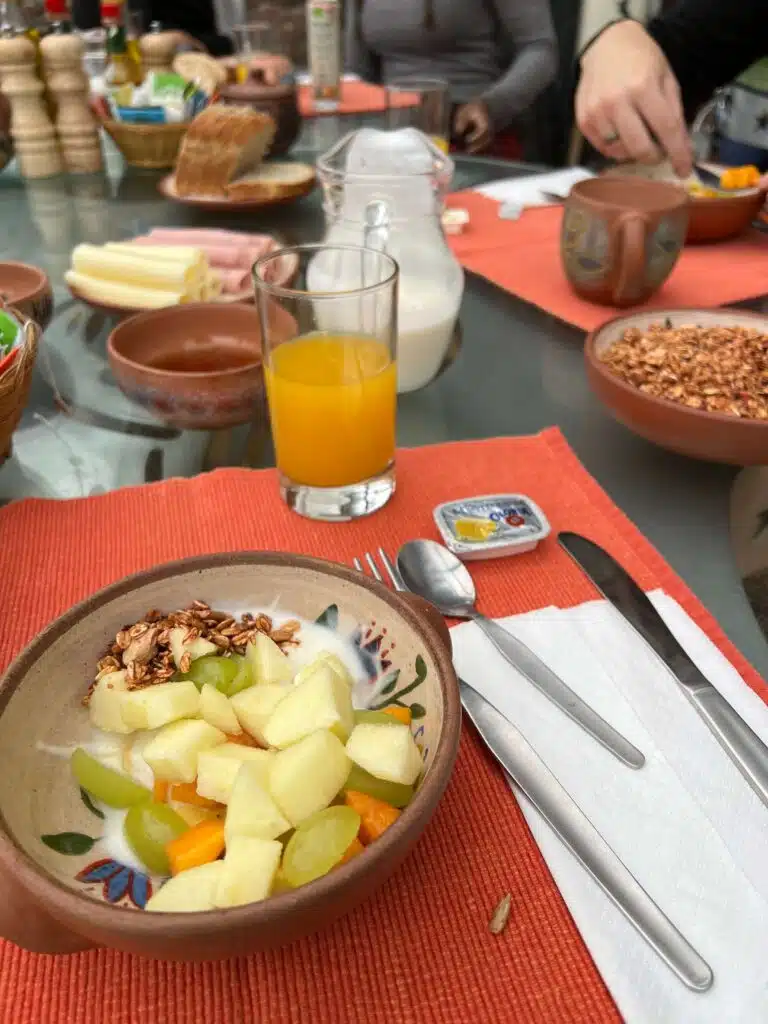
I will note that there is no restroom in the dining pod so if you’re the type of person who has to go to the bathroom shortly after you drink coffee, you might want to abstain. It can take several minutes to get your gear on, climb to your pod, and get your gear off to use the toilet.
The dining pod did also have a couple of phone charging cords you could use, but we just used our own portable chargers.
The Pod
To get to our pod we had to climb in the dark (with a headlamp) from the dining pod to our pod. We were assigned the furthest pod and climbing in the dark proved to be much more terrifying for me than the daylight (I was really glad I chose to stay sober!). I was very happy once I reached the deck and was able to climb down the hatch into my pod. Note: they intentionally chose to put the hatch on the roof to prevent issues with sleep walkers!
The guide gave us a tour, instructions for the toilet, and left us with a radio that we could use to get in touch with them. Importantly, we had to radio and let them know anytime we were leaving our pod (and only with full equipment on!). We realized we’d left a bag in the dining pod and radioed them and they brought it to us so we didn’t have to go back out.
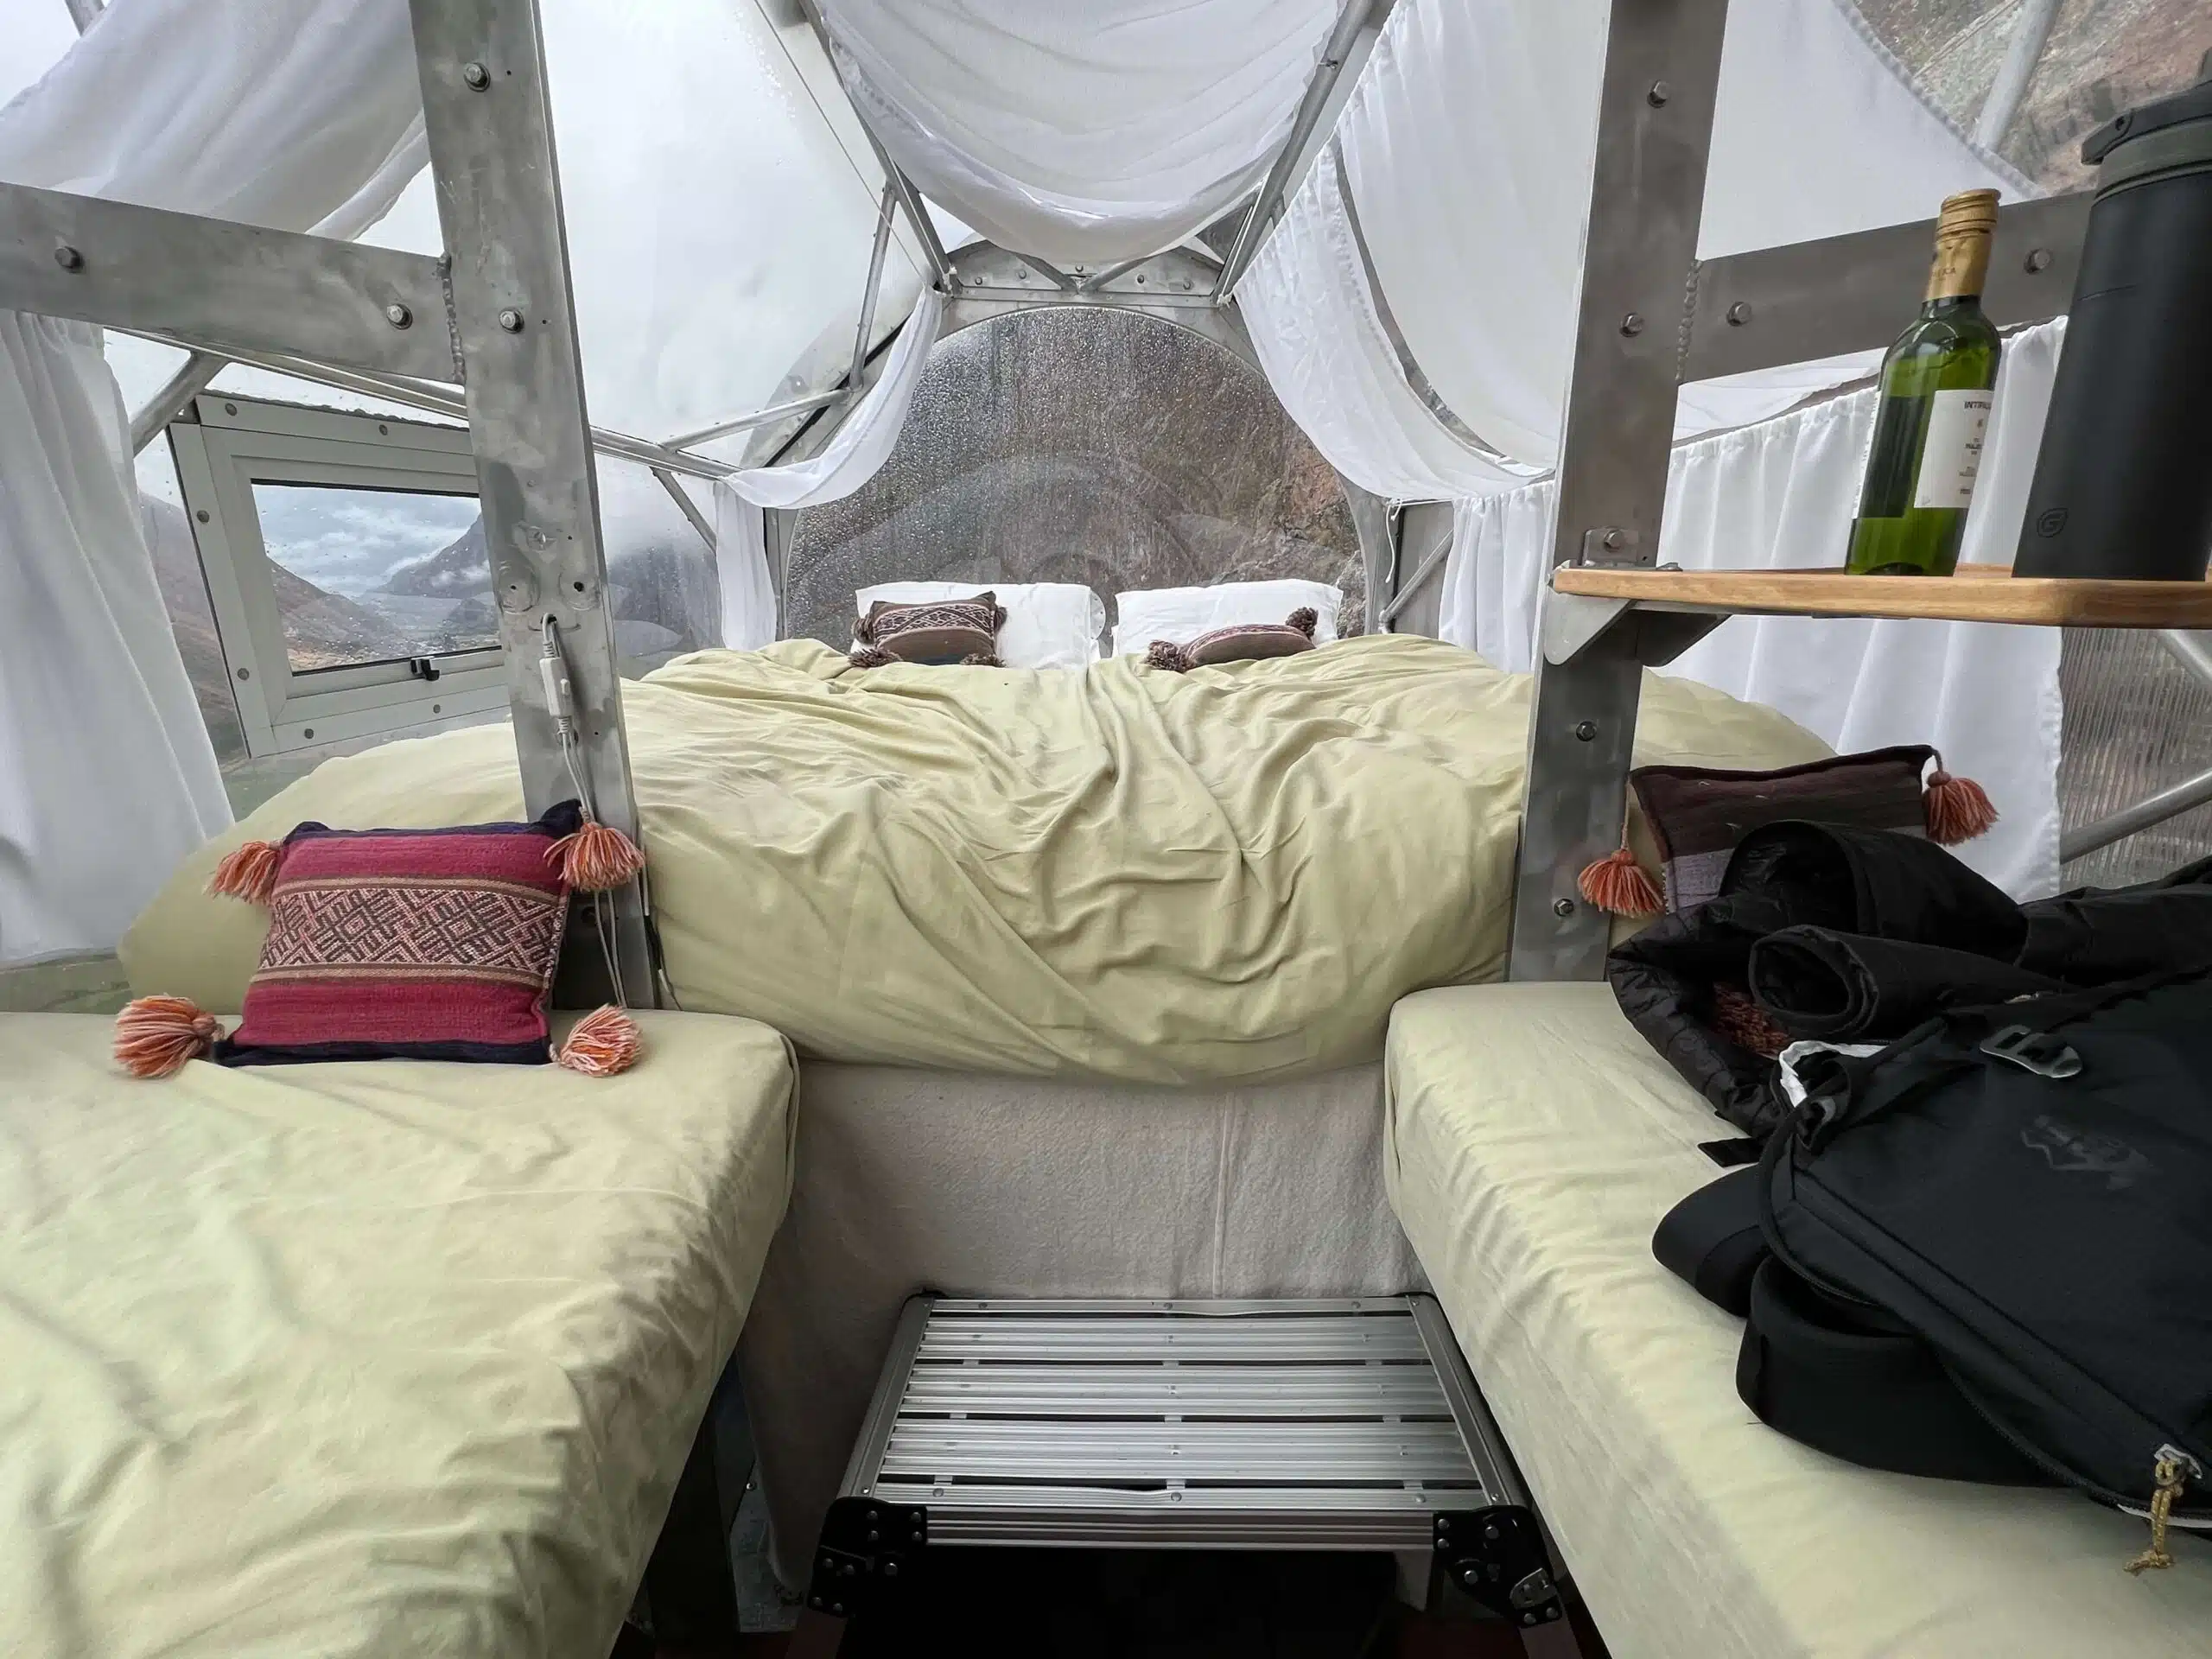
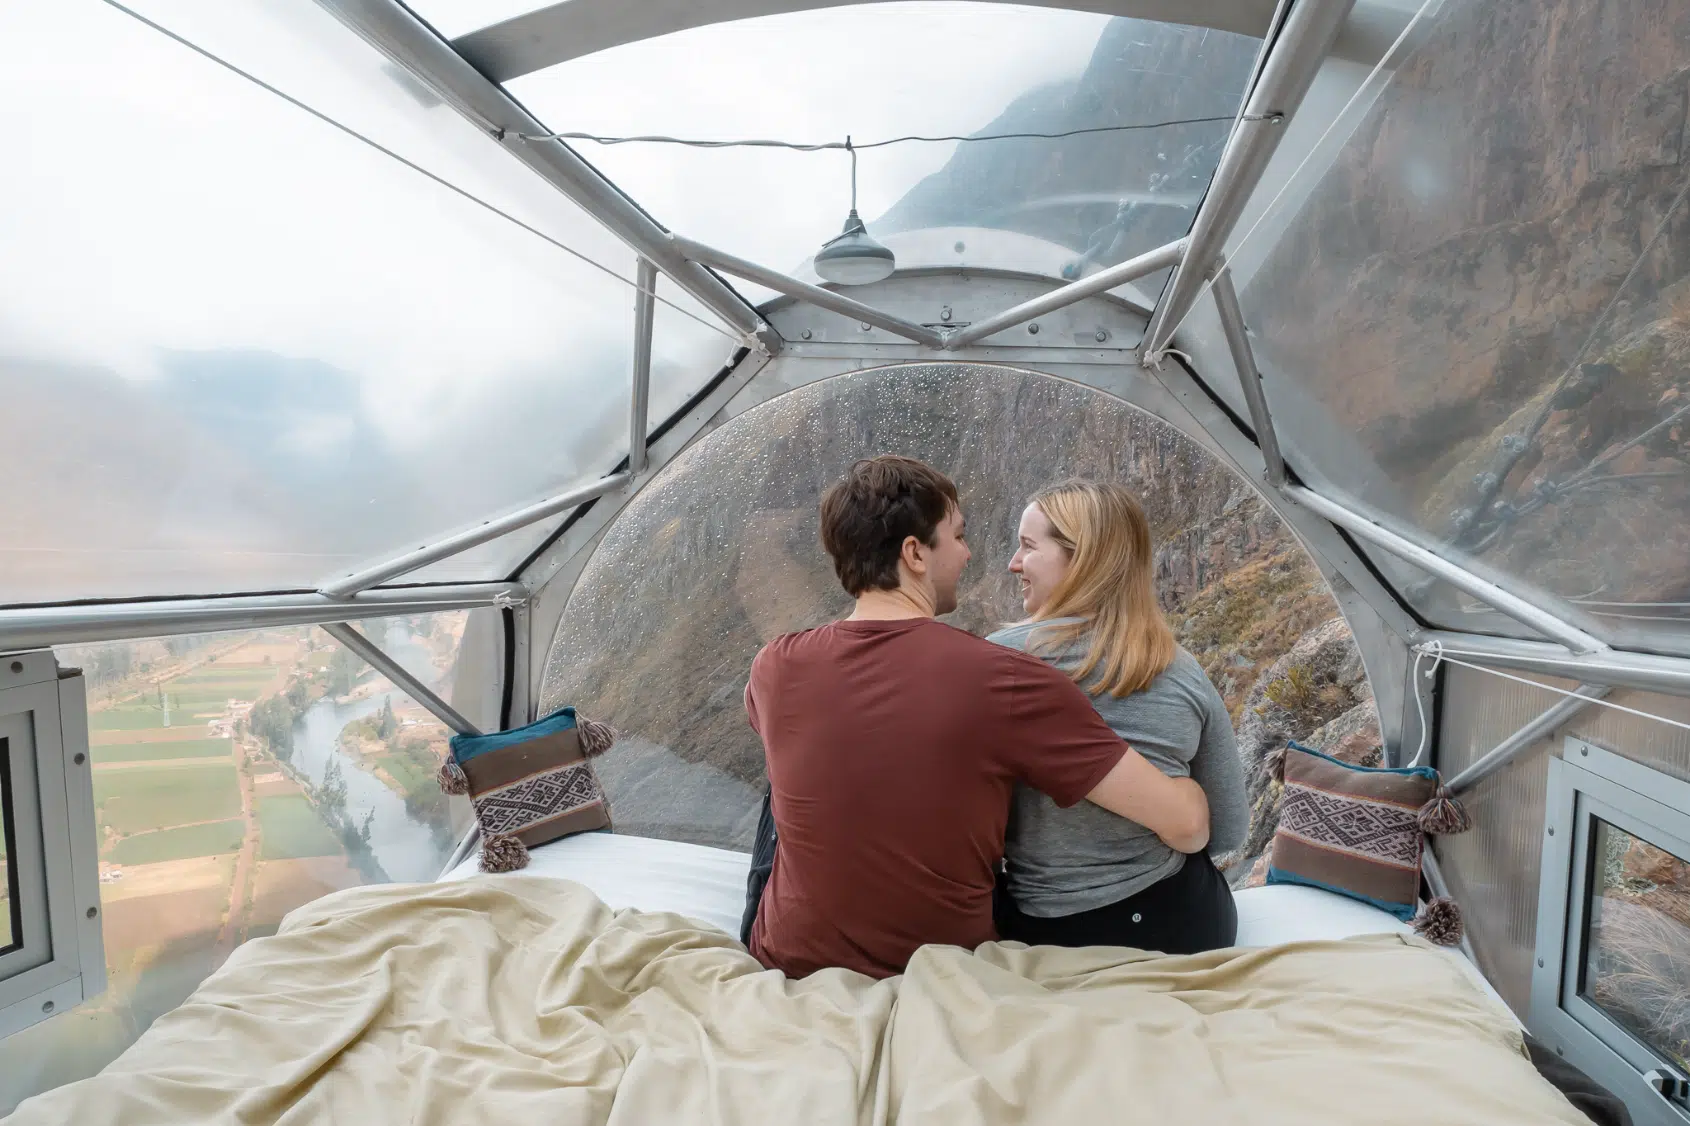
Each pod holds up to 4 people (1 king bed and 2 twin beds), but your pod is private to your group. This meant my husband and I had the pod to ourselves with no strangers. These pods are not very large, measuring only 24 feet x 6 feet. Having 4 people (especially adults) in there would be pretty tight. I personally think 3 is the maximum that can comfortably fit. We used one of the beds just for our stuff.
There is electricity in the pods that provides light but there are no outlets or Wi-Fi, so you have to be sure to pack a power bank to charge any electronics. We found Claro to be the best cellular network in the area (I couldn’t load anything using Movistar).
The Bathroom
You may be wondering how you use the bathroom 1300 feet above the ground. Skylodge installed a dry toilet system as a solution. Men pee right into a funnel and ladies use a chamber pot that you empty down the funnel. For #2, there are plastic bags provided with a special powder inside to eliminate odors. Then you tie up the bag after use and throw it down the chute. There are 2 rolls of toilet paper provided, as well as a disinfectant spray to use in the toilet after each use to keep the smell down.
Our bathroom did have a view into the next pod’s bedroom, so we kept the curtain pulled.
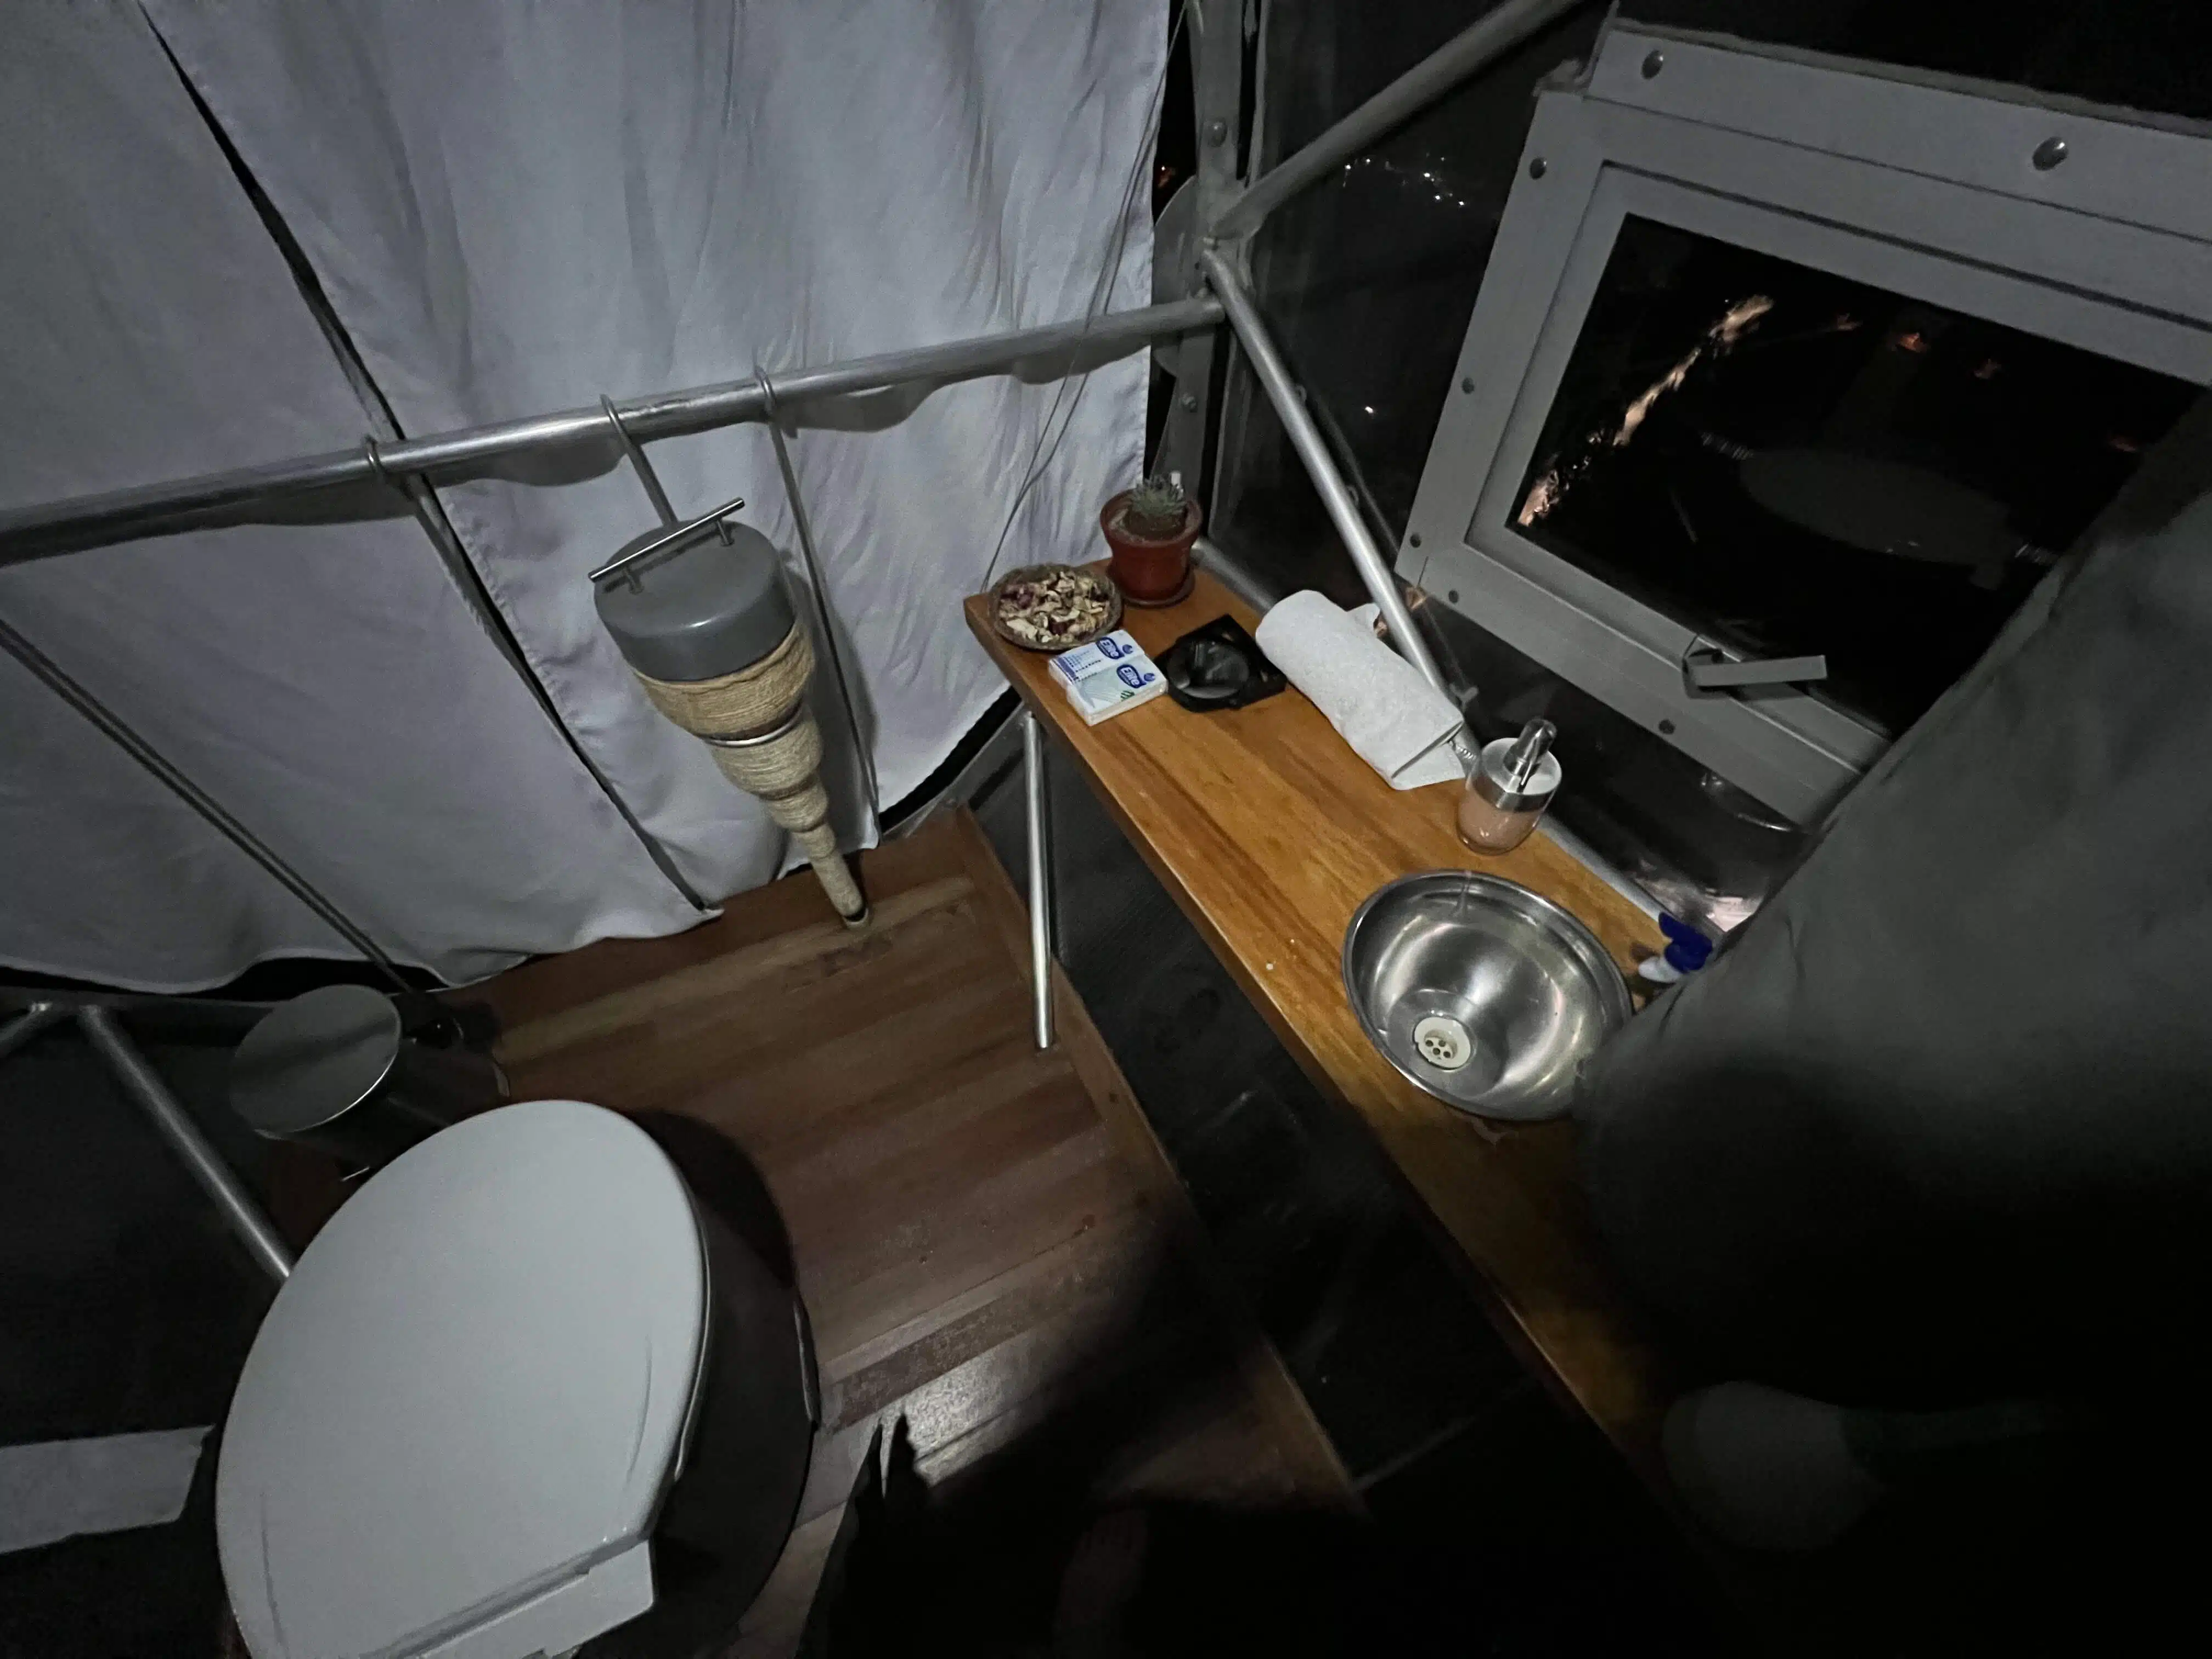
Also provided in the bathroom is a large jug of filtered water that you can drink or use to wash your hands, brush your teeth, etc. There is also hand soap, a couple of hand towels, tissues, and a small mirror. There’s no way to take a proper shower, so we were glad we’d packed deodorant wipes after 2 hours of climbing.
Hot water, tea, cups, and games (cards and dominos) were also provided in our pod as well as seat cushions for the deck and extra blankets to keep warm.
Sleeping on a Cliff
When we turned out the lights, it was not nearly as dark we expected. There was a lot of light from the roads and train on the valley floor that reached us high above. Though we lucked out with clear skies, the “Million Star Hotel” wasn’t quite as spectacular in that sense as I’d hoped. The glass on the roof of the pod makes it hard to see all the brilliance of the stars too. To get the most out of the view, you have to open the entrance hatch. It was incredibly windy while we were there, so we chose not to open it.
The whipping wind was the most off-putting to me. While the dining pod is on stilts and doesn’t move at all, the pods sway slightly in strong winds (it’s very safe, just disconcerting). You can also hear car honks and trains from down below. I played music out of my phone to distract from the other sounds while we drank wine and played cards in our pod. Then to sleep, I wore earplugs and Cozy Band headphones that were playing Friends episodes I’d downloaded to my phone to help me tune out the outside noises and sleep. Thomas didn’t use earplugs and slept like a rock, so it’s really person-dependent.
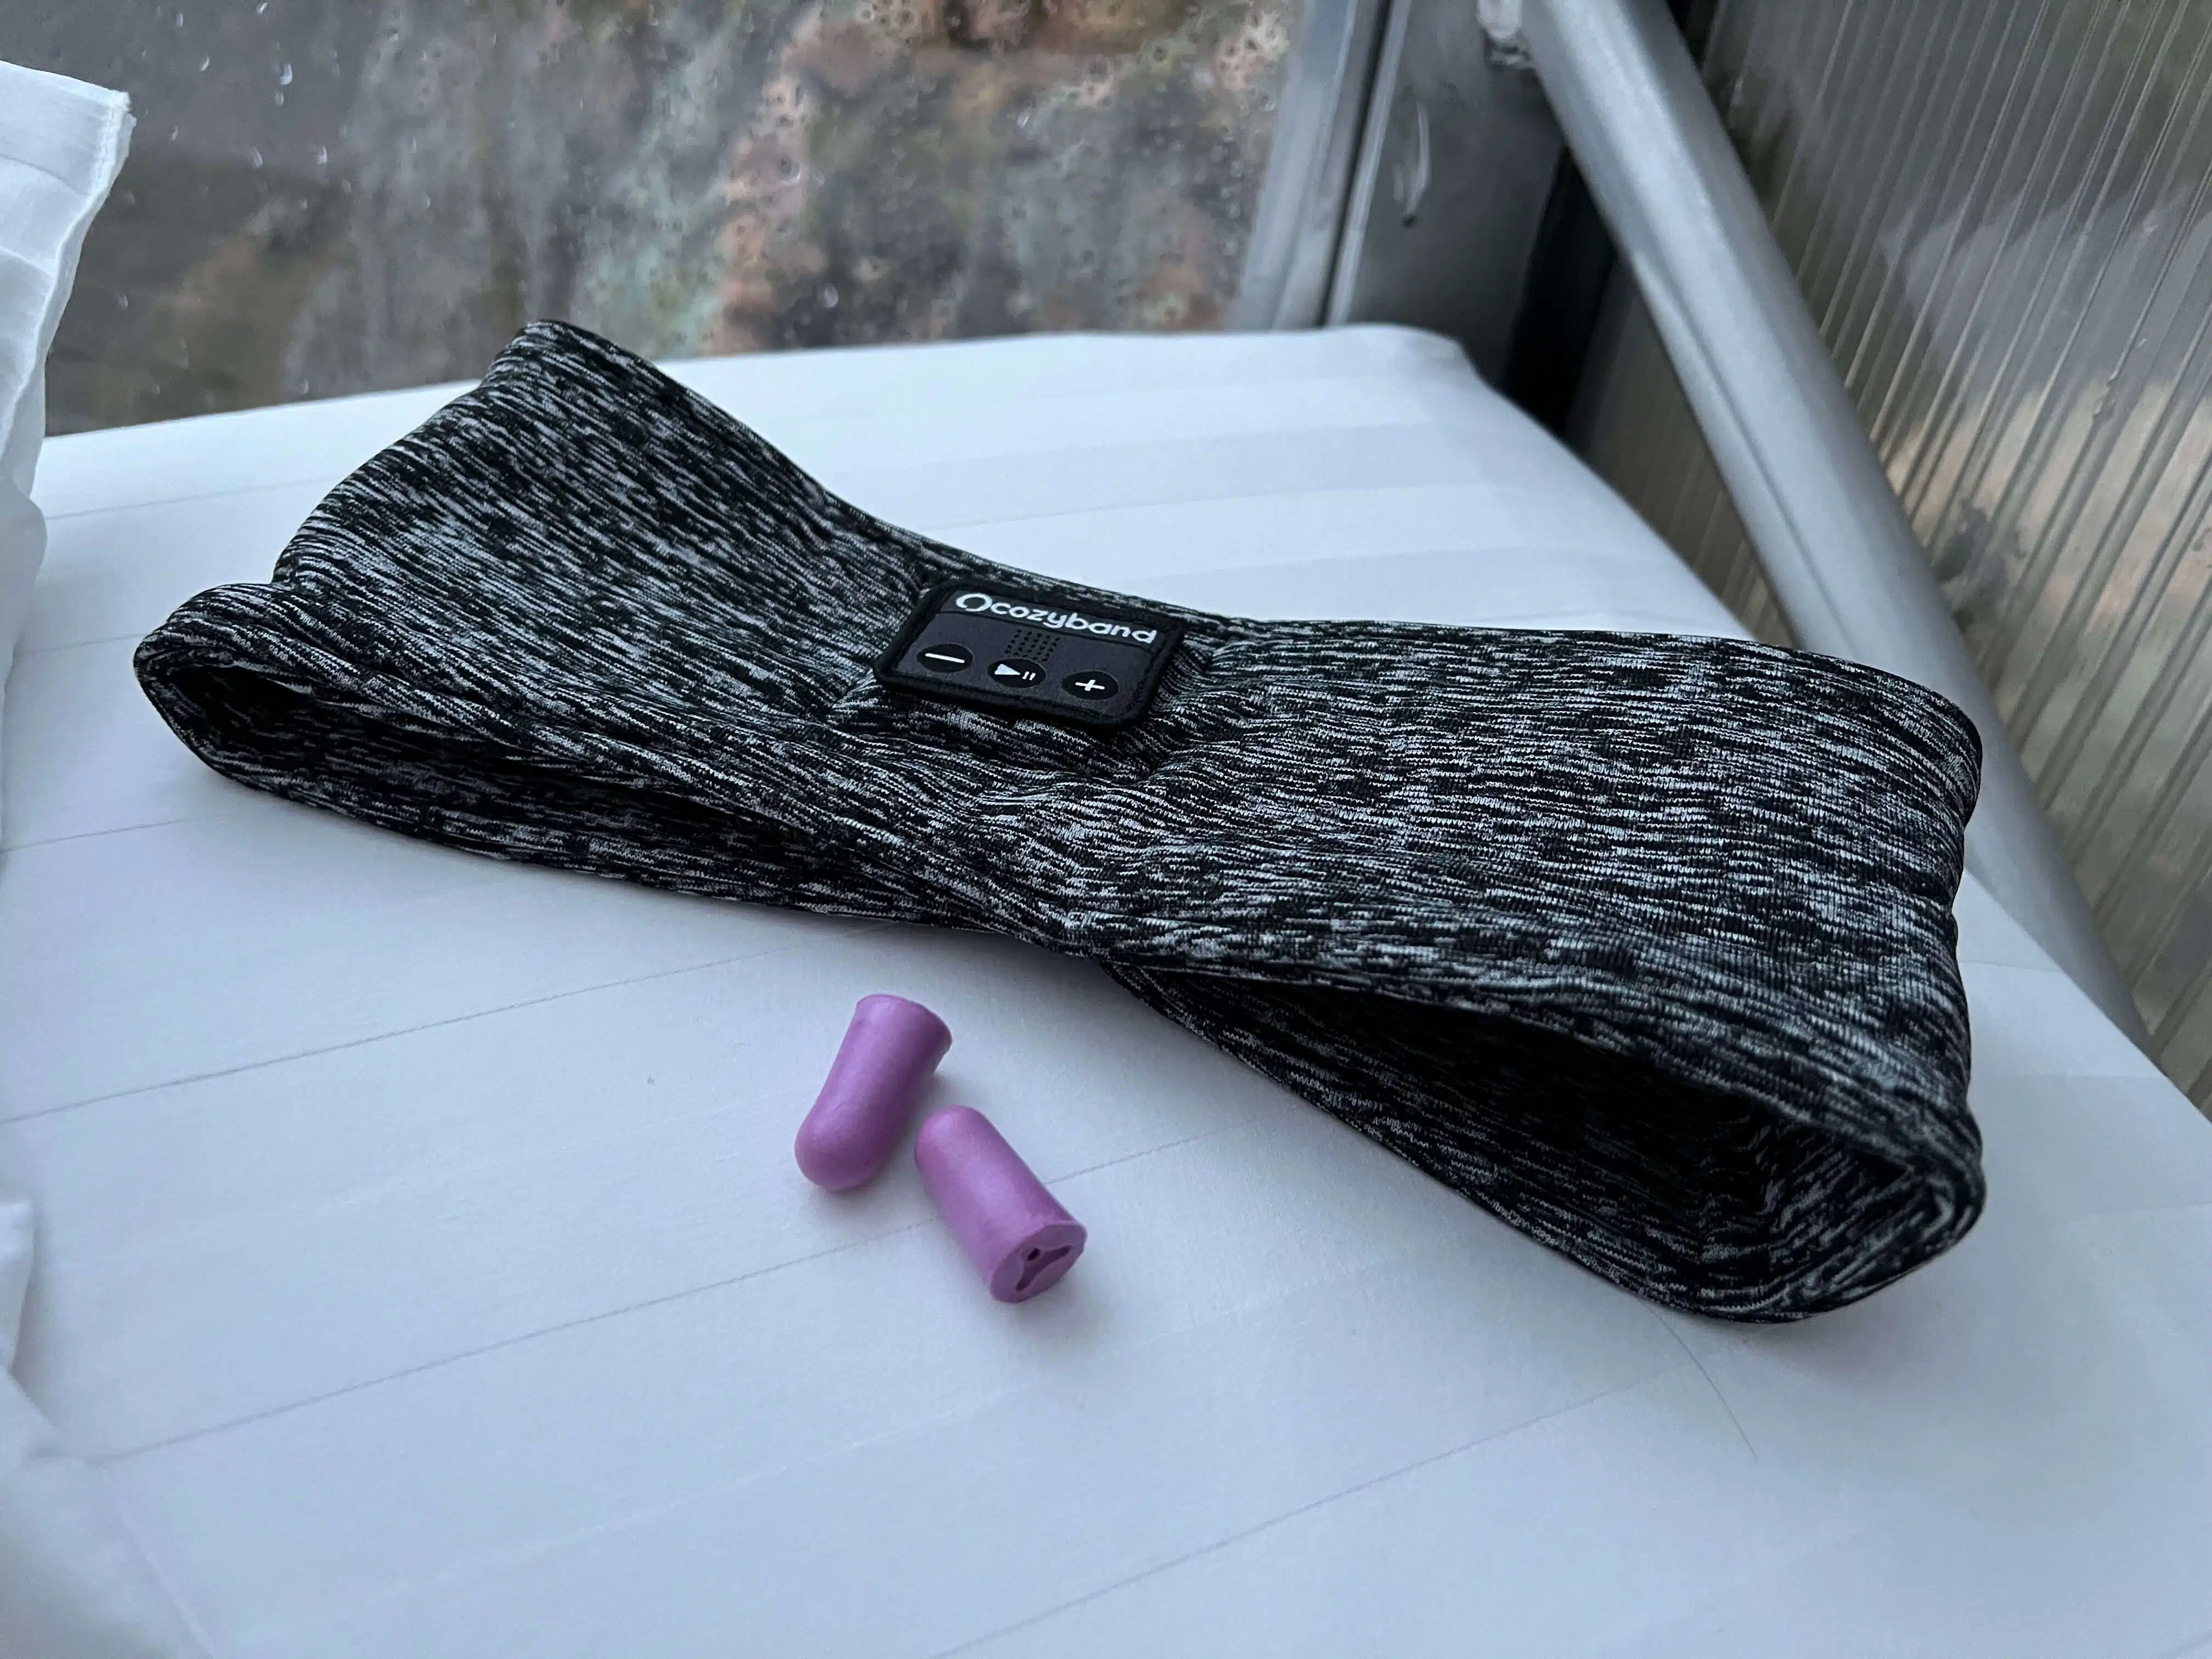
I didn’t sleep super well, waking up a every few hours and getting back to sleep. However, I blame part of this on the elevation. The valley floor sits at about 9000 feet above sea-level, so we were over 10,000 feet up in the pods. Disturbed sleep is a symptom of altitude and it was our very first night at elevation (I also didn’t sleep great the next couple of nights for reference).
The bed itself is extremely cozy and warm. While I went to bed cold, I did wake up and take layers off as the comforter did a great job. When we woke up around 5:30AM, it was on-and-off raining and we had an absolutely incredible view of the valley floor below. The rain really added to the moody morning vibes.
Ziplining Down
After breakfast in the morning, we had about an hour of free time before we had to leave our pods and zipline down. The zipline starts above the top pod, so there’s a short amount of via ferrata climbing to get to the start. From our pod there were 2 ways up – one was shorter and harder and the other was longer and easier. I chose the easy route while Thomas went for the challenge. There are 6 total zip lines – the first is a short warm up, followed immediately by the longest one, and then 4 of intermediate lengths.
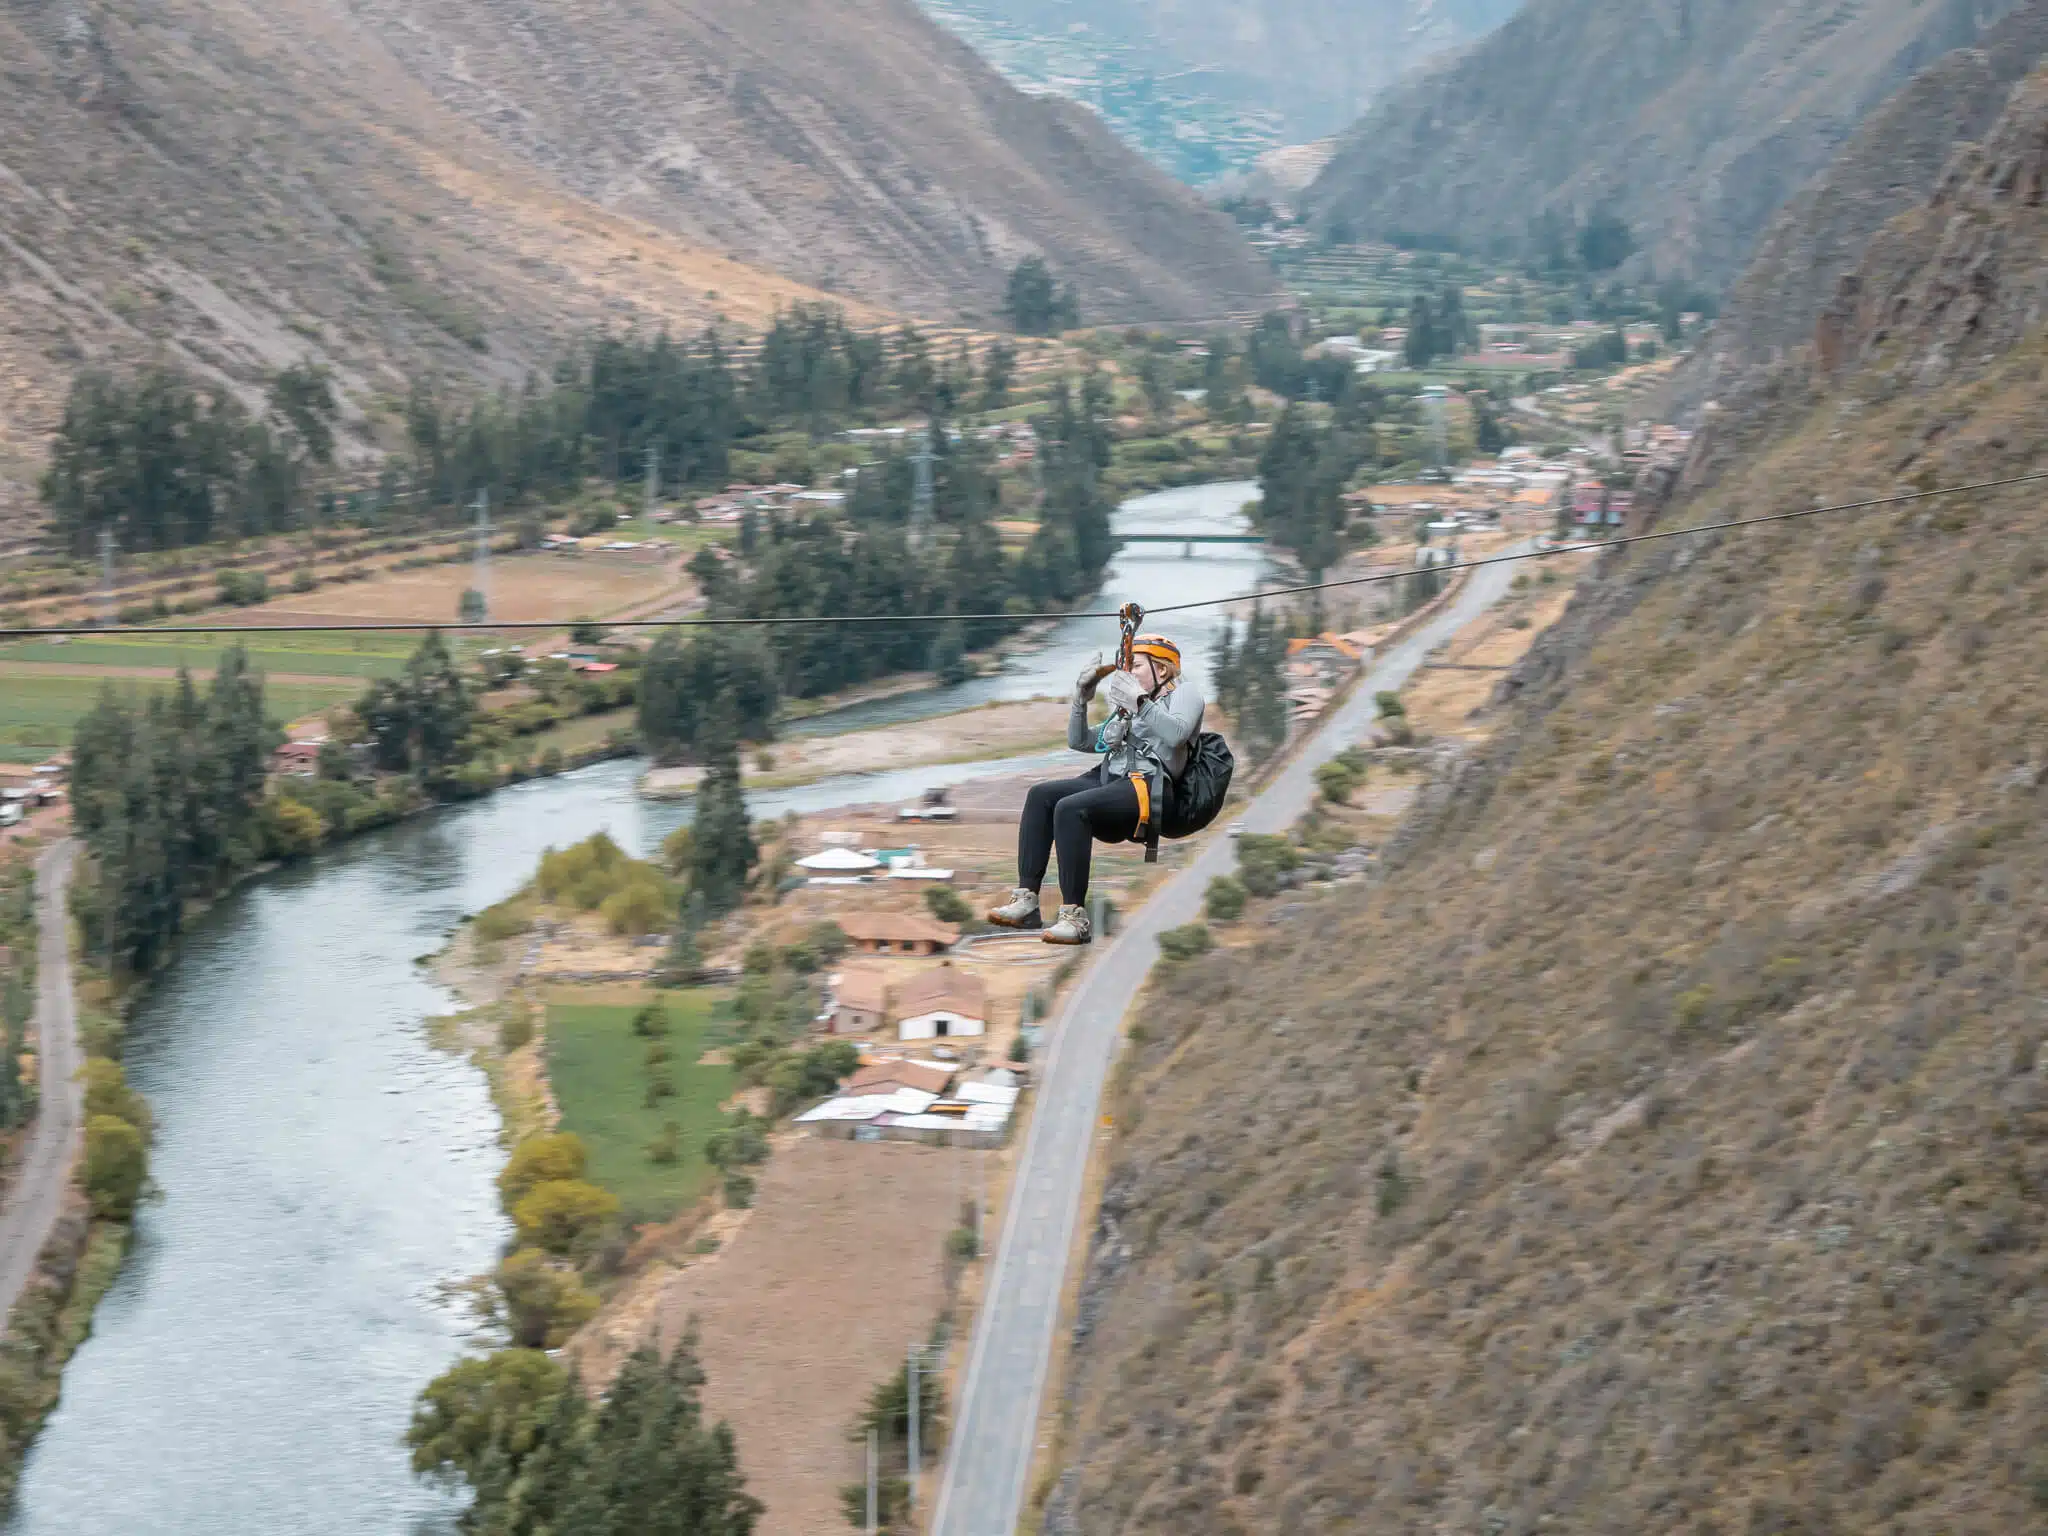
The second zip line is so long that they did require us to go tandem with our partner, so that we wouldn’t get stuck because it was windy. Even with Thomas and I going together we barely made it to the end!
These ziplines have an auto brake, but you do also have to use the leather gloves they give you to apply pressure to the cable as a hand brake as well. They taught us the hand signals to look out for which were easy to follow.
In total, the zip lines took about 1.5 hours to get to the bottom. There was also some light hiking between some of the lines.
The Photography Package
The cost of Skylodge includes all your climbing equipment, guides, and food for the entire experience. However, this does not include the optional photo package, which is an additional 400 Peruvian Soles (or ~$103 USD). The pricing is per pod group, not per person. If you’re interested in this add-on (which I highly recommend), it’s best to bring cash (either soles or dollars). We didn’t have enough cash on us, but they were able to accept a PayPal payment instead. Thankfully, we had cell service in the area! They take payment after you’ve ziplined down on Day 2.
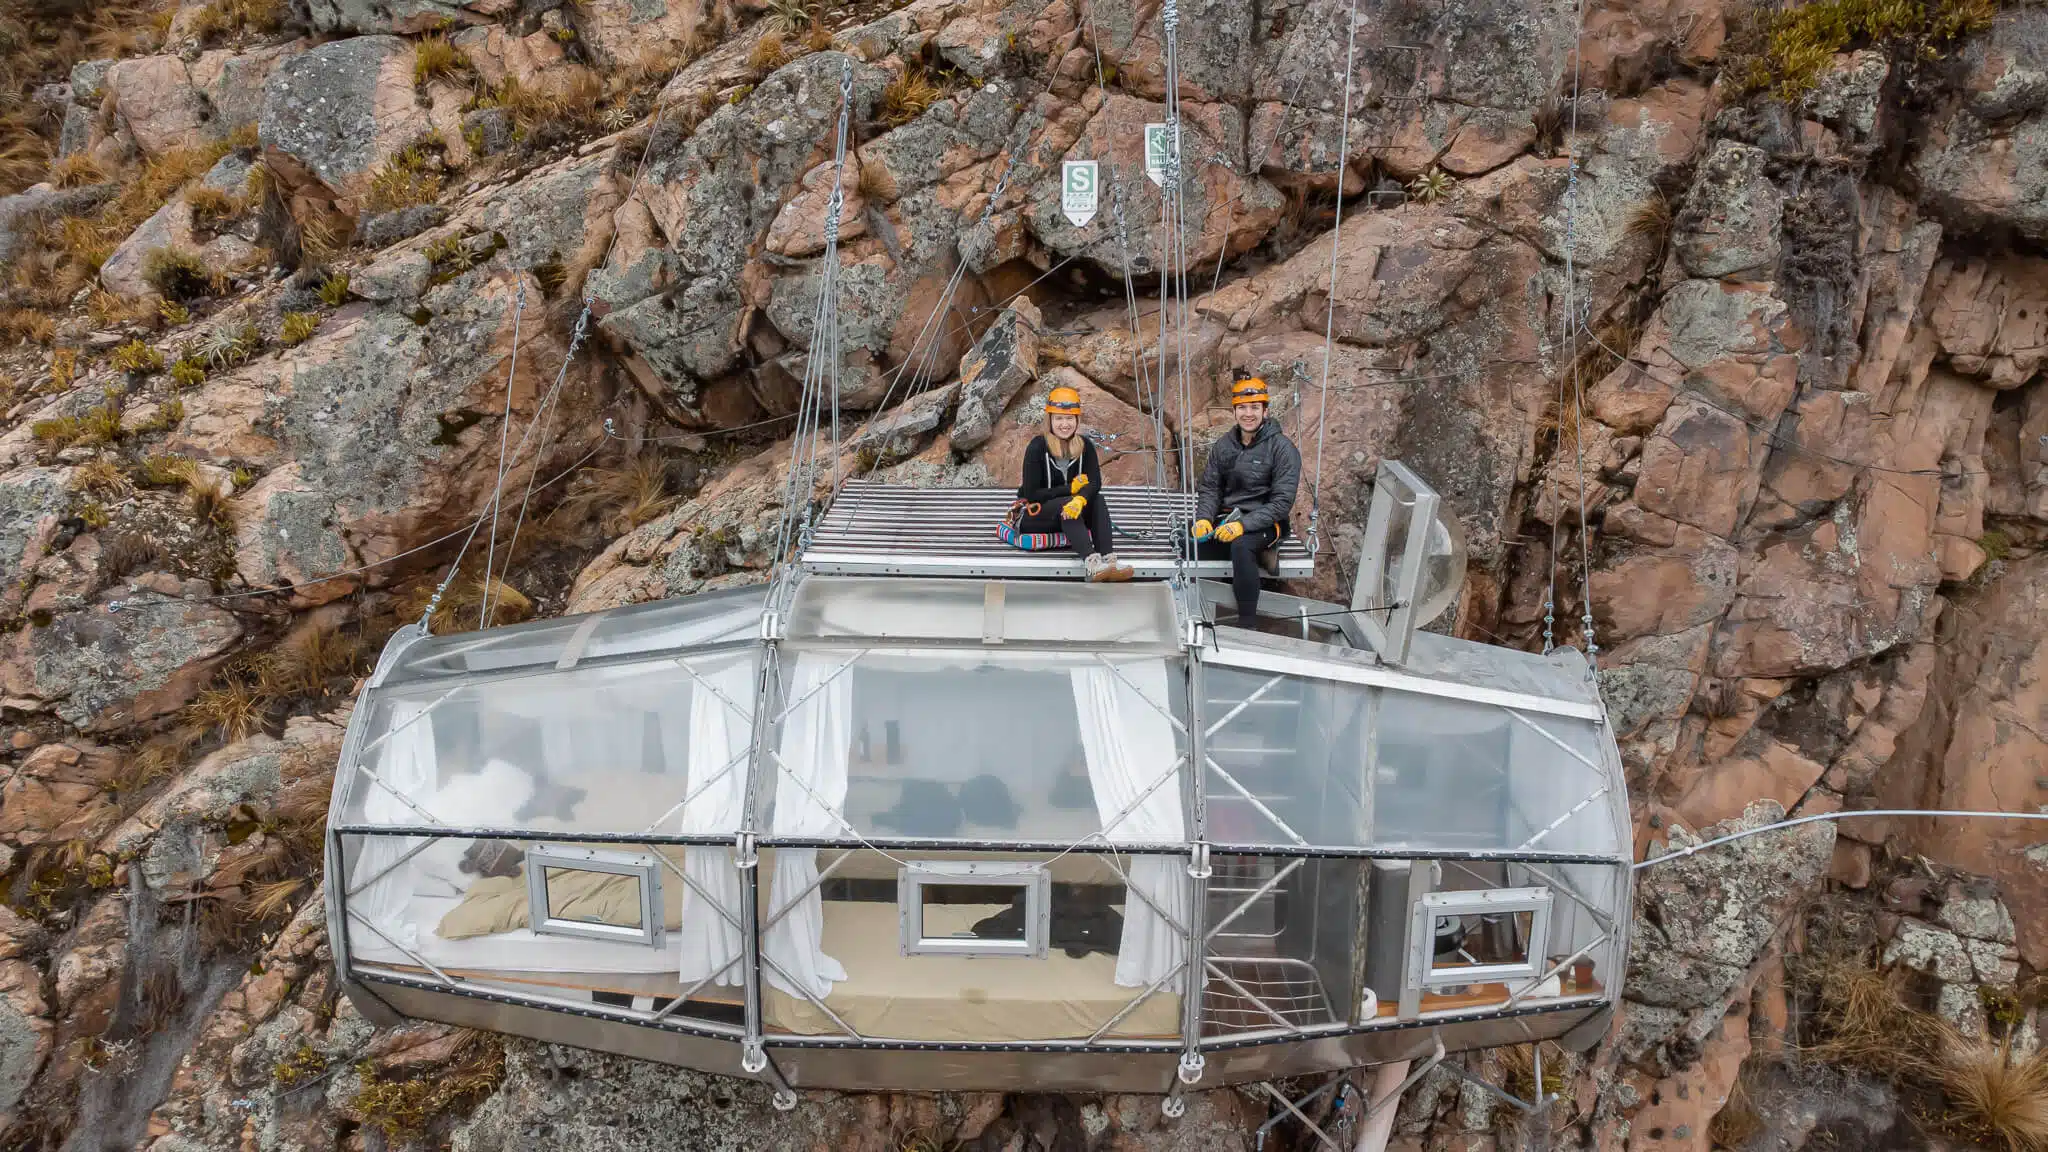
The photography package includes photos of your climb, time in the pod, the zipline, and drone footage of you in your pod and the first 2 ziplines. During the hour of free time in the morning, the photographer spent 20 minutes with each couple taking photos both in the pod and drone footage in a mini-photo shoot. We got so many more photos than we expected and they turned out great! A lot of the photos in this article are from the photo package. We had almost brought our DJI Mini 3 Pro drone on this trip but ultimately decided against it to save space. That was the right call.
The photographer took our emails and told us to expect our files in 3-4 days via WeTransfer. In reality, they actually showed up about 24 hours later! We had 7 days to access the files but he said we can email him if we needed them resent.
A Note on Weather
Skylodge operates year-round and only closes for 2 reasons: one is their annual staff party and the other is if fires nearby come too close. Other than that, they operate in all-weather conditions, so you need to prepare accordingly. Peru’s dry season is typically April to October and the rainy season is November to March. We went in early October and still experienced some rain. Also, the weather can change on a dime and the apps are extremely unreliable. It’s really just best to prepare for everything and dress in layers.
✈️ Want to use your miles to fly to Peru for free??? Redeeming points for free flights and hotels is easier than ever with Daily Drop Pro, your one-stop-shop for all things miles & points. Click here to sign up for this game changing app and receive exclusive bonus content from me.
I also love Daily Drop Pro’s cash flight deal alerts, card wallet for organization, and community feature where you can ask questions and share your travel wins!
The Staff
The Skylodge staff are truly incredible and very professional. They were extremely helpful in giving directions and making sure we were always safe. They also cooked all our food for dinner and breakfast.
Even more impressive to me is that everything at Skylodge has to be brought up on their backs every single day, from the food to the toilet paper. It takes a lot of hard work to run this operation! We had 2 guides and the photographer with us on our trip. The guides sleep in the dining pod to ensure safety. They are always on call through the night in case you need anything from them. The photographer didn’t stay in the pod, instead going home and climbing back up the next morning.
Thinking about the logistics of an operation like this kind of blows my mind. We make sure to tip our guides appropriately for their hard work once we were safely on the ground.
What to pack
- Small backpack
- Passports – required upon arrival
- Portable charger (fully charged!) and cords
- Shower wipes
- Headphone headband + earplugs
- Hiking shoes (for extra traction compared to sneakers)
- Toothbrush/toothpaste
- Koala Hangtime phone harness (great for taking photos during the climb without worrying about dropping your phone)
- Sunscreen
- Bug spray wipes
- Change of socks and underwear
- Clothes for various weather – the weather is really unpredictable and can be cold, rainy, sunny, etc. so plan ahead!
- Deodorant
- Sunglasses (here’s my favorite cheap pair!)
- Cash (for photo package)
Optional but glad I brought:
- Hairbrush
- Medication
- Face wash
- Makeup
- GoPro + mount and extra battery
- Waterproof backpack cover
Alternative- Star Lodge
If Skylodge intrigues you but seems a little too far outside your comfort zone, the company behind the pods, NaturaVive, also runs their newer nearby Star Lodge. They offer 6 similar pods. However, they’re lower down the mountain and are accessed via a hike. Star Lodge also features Onsen-style wooden hot tubs for you to enjoy overlooking the valley. It’s definitely a much more relaxing experience than Skylodge.
Personally, I was looking for more adventure than relaxation and am glad I went with Skylodge.
In Conclusion
If you’re planning a trip to Peru, I highly encourage you to check out Skylodge. It’s definitely a pricey activity, especially by Peruvian standards, but it’s absolutely a once-in-a-lifetime experience I will never forget. And if you’re nervous like I was going into it, know that you absolutely can conquer the fear and come out of it with nothing but a smile on your face and pride in yourself.
Save this pin to Pinterest for your future planning!
You may also like:
